Showing posts with label masculine. Show all posts

Thursday, September 3, 2015

Woodware: Sketch 45 Goes Masculine

Woodware Sketch 45
We're up to number 45 on the Woodware Sketch Challenge parade. The visual is shown above. When you play along, be sure to follow the info on the Woodware Blog to upload your creation for a chance to win.

My card today is so simple. Unusual for me. Lol. I broke out my Andy Skinner designs from Stampendous, including his Industrial set and his Nature set.

The border at the top of the design was stamped in black on a kraft card using his crackle design. The green panel was stamped using the tree and birds from the Nature set. Finally, the barn and fence from the Nature set were stamped in black on the burnt orange square. All edges were distressed with ink and the sharper edges of the Dreamweaver Picasso tool!

The sentiment seemed appropriate, and finishes off this perfect-for-any-occasion greeting card.


Saturday, May 30, 2015

Woodware: Travel in Vintage Style


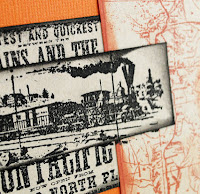
The Woodware team are traveling back and forth from the UK to the US this week, and a few places in between! My travel-themed card was created with the Stampendous Cling Locomotive, Railroad Poster, and Railroad Map. Stamped simply in black or burnt orange ink on kraft cardstock, the layers are what make this CAS card, and the orange background card really makes it pop. A couple of brad fasteners add a bit of dimension and finish it off along with a stamped sentiment from the Stampendous Perfectly Clear Gears Kiddo set.

Thursday, May 21, 2015

Woodware: The Difference Between Men and Boys is the Price of Their Toys!

My son has a few of these "toys", and they are his favorite things to "play" with. So, of course, when Stampendous came out with this Cling Motorcycle Elements image, I had to buy it. The card that I created with it I kept simple with a bit of grunge. Stamped in black dye ink, and colored with shades of gray markers. I placed the Dreamweaver Houndstooth background stencil over the top, and ink-stenciled the pattern over the panel in gray ink. The top edge was torn, and the panel was adhered to a black card. I attached two grommets, and tied a scrap of ribbon through the holes. Just because you're creating a masculine card, does not mean that it has to be boring or difficult. Be sure to see what the rest of the team have been posting for the "Boys and their toys" theme this week. You'll find the links on the Woodware blog.

Wednesday, May 13, 2015

Stampendous and Clear Scraps: Clearly Creative


The Stampendous and Clear Scraps teams are having a transparently good time this week, and we'd love for you to visit our blogs for fun inspiration and an opportunity to win a fabulous prize package. We have three prize packages, each of which will include our Cling Jumbo Filigree Stamp Set, a Jumbo Perfectly Clear Acrylic Handle, PLUS a Clear Scraps Mixable Album and some extra acrylic accents! Comment on our blog and each designer’s blog of the day throughout this week of our hop and the winners will be announced Monday, May 18th. Please click the Official Rules for all the info on winning.

Clear Scraps are an amazing product, clearly designed for all of your favorite art media. You can read all about it on their website, as well as find locations to purchase this terrific line of products...and their blogsite is full of suggestions for incorporating these goodies along with products like Stampendous and Dreamweaver.

Here's what I've created for today's post:


This page is the perfect example of how the perfect embellishment can MAKE the project. I created this scrap page featuring pictures of my son, Matt, and his track racing that he loves so much. He also loves to fix things, change things, add things, and always has.
Therefore, using the Dreamweaver Stencils' Gears background was appropriate. This was paste-embossed in Matte Black, and sprinkled with Stampendous Aged Taupe and Aged Bronze Embossing Enamels, and then heated for plenty of texture and shine without looking blingy. The rest of the background was a few stamped images from Andy Skinner's Industrial and Steampunk Cling Sets licensed by Stampendous. Finally, the wonderful Clear Scraps Gears border which I daubed on more of the Matte Black
Embossing Paste, and sprinkled with a bit more of the enamels, and heated slightly. You have to keep the heat tool far from the surface or the acetate border will warp a bit. Once cool, I swiped a bit of Black StazOn ink around the edges. I'm really happy with how this turned out, and hope that he will be, too.

Today's link list:


Wednesday, April 8, 2015

Musically Inclined with Stampendous and Dreamweaver

Acoustically speaking, the Stampendous team are really enjoying their musical creations this week. My feature card was a cooperative creation. I handed the Acoustic Sounds image and my Copic Sketch markers to my son, Bryan for him to stamp and color that particular panel. He really enjoyed mimicking the wood grain, attempting to match the color variations to his own acoustic guitar. I added some Memento Toffee ink around the edges of the panel, and sprinkled a bit of Stampendous Spoonful of Rust encrusting mix around the edges before heating to melt.

The kraft card base was ink distressed. A panel of Core'dinations Chalk Core was machine embossed with the Dreamweaver Waves and Dots stencil, sanded, and brushed with the Toffee ink for a cohesive and grungy look. A scrap of guitar music was distressed and added, along with a handcut guitar "pick" tucked into an actual wrap of guitar string wire. The sentiments added were from the Perfectly Clear Happy Greetings set. A perfect masculine card for your guitar "hero".


Remember, the rest of the team are musically inclined this week as well! Just follow them from the links on the Stampendous blog.

Thursday, November 13, 2014

Dreamweaver: I'm Thinkin' That I'm Thankful

As we officially head into the holiday season, the Dream Team are challenging all of our followers to be especially "Thankful and Thoughtful" during the month of November. We hope that you will link your creations with this theme in mind on the Dream It Up! blog using the Inlinkz tool. Our "thanks" to you is providing you with the opportunity to win the stencil of your choice, and a bonus stencil of our choosing could be yours for using Dreamweaver product(s) in your artwork. I'm posting this for you today:

Ssssh, don't tell, but I've posted this card before, about three years ago. Since it is appropriate for this month's Thankful and Thoughtful challenge, I thought I'd show it again. Men, too, appreciate receiving a handmade card once in a while, and a bit of thanks is always thoughtful.

The base of this card uses the Dreamweaver Stripes stencil machine embossed in both directions on Core'dination cardstock, and then sanded to reveal the plaid pattern. A large panel was ink-stenciled in  brown on kraft cardstock with the Houndstooth design. I love the houndstooth stencil...in fact, all of the menswear-inspired patterns that Dreamweaver carries...Plaid/Stripes, Houndstooth, and Herringbone.

I used small scraps of Mercart copper-colored aluminum, machine-embossed with the Gears background, sanded, and slightly ink-distressed, to wrap around squares of cardboard as a focal point. Finally, I paste-embossed in Copper the sentiment...this "Thanks" has such wonderful font.

By the way, the Dream Team are very THANKFUL when our followers are THOUGHTFUL enough to leave us a nice comment on our posts! Here's the "B" team lineup for this week, as well as our very special guest designer, Linda Neff!


An InLinkz Link-up

Friday, June 13, 2014

Woodware: Sketch 35 for That Old Chap


I'm gearing up for fun this week with the Woodware Sketch Challenge No. 35...how about you? I've created a fun masculine birthday card featuring the Clear Magic Single "Spiffing Day" designed by Francoisé Read. So fun! I've used patterned paper from Cardworks "Time Flies" 8 X 8 pad...all gears, which goes perfectly with the Dreamweaver Stencils' Steampunk Clock design, simply ink-stenciled with a brush and grey ink. I used a softer touch with the ink over the sentiment panel. A bit of corner rounding, distressing, and a cut out pocket watch from the paper pad, and the card is done! An easy one to make in multiples...for all of the old and young chaps in your life!

Be sure to play along with the challenge, and upload your creations to the Woodware Blog for a chance to win!


Thursday, May 8, 2014

Dreamweaver Stencils: More Fun with Flora and Fauna

Welcome to the merry month of May! The Dream Team are challenging you this month to a "Flora and Fauna" theme! Considering most of the Dreamweaver designs incorporate both of these in the huge variety of stencils, you should have no problem playing along with our challenge this month! As usual, link your creations at the end of the Dream It Up! blog post, or at the end of our posts where it says, "Add Your Link". As the challenge gets underway, you'll see thumbnails of others who are playing along as inspirations for your own creations!

Here is my creation for this week:

Nothing floral about this card, and I'm not sure that this cat qualifies as "fauna". He may be just too cool for that! The Retro Standing Cat has been paste-embossed in Glossy Black on brown cardstock and cut out to be popped up above a very jazzy background. The left panel is black on black with the Pop Squares stencil in Glossy Black again...as was the Guitar and the banner from the Cat Words stencils. The Guitar had been pasted on a panel with a music score printed on it, and I added shading with my Copic markers. The colors are more masculine, which would make this a great Father's Day, graduation card, or birthday card for a musician, or just someone who really loves music...and cats...cool cats.


Please welcome our new "B" team, officially posting for the first time!


Thursday, July 18, 2013

Woodware UK: The Great Outdoors (Mind You, A Moose-bite Can Be Nasty!)


Sorry. I just could not resist the added funny. If you can name the movie that quote came from, add it to your comment below!

The Woodware UK team are playing in the Great Outdoors this week, and to me nothing says great outdoors more than a moose. They're just so huge and funny looking. My moose looks a bit wrinkled, don't you think?

I took a panel of ivory cardstock and machine-embossed the Dreamweaver Moose. Then I took a dauber and several colors from a Splendor inkpad, and brushed over the surface. I spritzed the entire panel with water, and crumpled it in my hand, and then opened it out flat again. When dry, I brushed more inks over the surface to catch the folds and wrinkles. A little black ink for distressing and a torn edge finished the panel. The kraft card base was ink-distressed as well in brown ink, and softly stamped with the Jeans Pocket image randomly. I wrapped some black hemp cord around the card for added texture.


Thursday, May 23, 2013

Dreamweaver Stencils: The Steampunk Clock is Ticking Towards Father's Day!


It's almost time for Father's Day, and if you're looking for a quick and fun project to show the dads in your life just how talented you are, how about trying something like this?


Once again, I used the Sizzix ScoreBoards Die Box with Scallops, and though it has a more feminine style with the scallops, I think that I succeeded in making this more masculine (or even appealing to the Steampunk crowd! I machine embossed the top flap with the Dreamweaver Steampunk Clock, and the main portion of the box with the Houndstooth pattern. Then I went a bit crazy distressing with ink...Tuxedo Black and Rich Cocoa Memento. For more dimension, I embossed a piece of the Mercart colored aluminum with the clock, sanded off the colored a  bit, and used some Black StazOn reinker over the surface. I spritzed a small amount of rubbing alcohol (isopropyl) on a soft cloth and rubbed away some of the black ink, leaving the clock looking distressed. With layers of Tim Holtz Gears and chipboard gears, and brad fasteners, and a snippet of May Arts Cotton twill tape (also distressed), I had the look that I was going for. I added a matching gift card pocket to tuck inside with a gift of a cup of Joe (or two). 

This was my creation for the Tiny Treats challenge at the Dream It Up! blog. How about playing along with us? Link your own creation to the linkytool on the Dream It Up! blog, or email pics to lynell@dreamweaverstencils, for a random chance at winning your favorite stencil design! Until then, check out what our "B" team has been up to this week, and leave them some love. Oh, and me, too!


Monday, May 13, 2013

Woodware UK: It's OMBRÉ, Hombre! For the Tough Guy!

This is a great time of year to have a stash of masculine cards on hand...for graduations, birthdays, and in the USA, Father's Day in June. This is a great card for each of those occasions, and demonstrates a very trendy look...ombré. The definition of ombré in the Merriam-Webster Dictionary is, "Having colors or tones that shade into each other —used especially of fabrics in which the color is graduated from light to dark".

I was able to achieve the look in the background by first using Dreamweaver's Glossy White Paste with the Houndstooth stencil over a black panel, and setting aside to dry. I also used the same paste with the Men's Tie stencil, and set that aside to dry as well.

Now's the time that I broke out my Dreamweaver Color Solutions Alcohol Inks, the blending solution, and the clever applicator that has a dual purpose of storing the felt discs. Each end of the applicator has a hook fastener to apply the disc to. On one end I placed a few drops of Lemoncello with a few drops of the blending solution. Then I tapped this color over the houndstooth panel on the top to the bottom, covering all the white areas. I flipped the applicator over, and added a few drops of Paprika red with some blending solution, and tapped this over the panel from the bottom and up about halfway. Flipped again, and blended slightly between the colors to create the graduated color effect.

On the tie panel, I taped the Stripes/ Plaid stencil over the tie, and applied the same inks through the stencil one way with the Lemoncello, the other way with the Paprika, and a slight shift of the stencil to tap what's left. Each panel was matted with a contrasting cardstock, two brad fasteners were added for the buttoned down collar, a fun "tie tac" brad sentiment finished it off. This is a fun technique, turns out unique each time, and a simple way to produce cards quickly. No more excuses to not have a masculine card on hand when you need it. Oh, and just a hint...you could easily apply this technique to a feminine card as well!

Be sure to check out the rest of the Woodware team this week as they inspire you with some great masculine ideas. Leave them some love as you go! Here's the link to the Woodware UK blog.


Wednesday, May 1, 2013

Woodware UK: ConGRADulations to the Grads!


Nothing makes time seem to by faster than having your child graduate from high school or university. The Woodware UK team has been challenged to post a graduation card this week, and if you hop on board with us, you'll have all of those necessary grad cards ready to go for this month and next.

I obviously went manly, and featured the Stampendous Cling Poised Gent image...stamped twice to layer one on top of the other on a die cut panel. Only a little gray shading was added by marker. This panel was layered over a panel of gray cardstock paste-embossed in Dreamweaver's Matte Black with the Dreamweaver Stencils' Houndstooth pattern. The Art Nouveau Flourish was ink-stenciled using dark gray ink, and highlighted with a Sakura White Gel Pen, on the card base as an additional...well, uh...flourish! A crisp white banner stamped with a sentiment from the Stampendous Perfectly Clear "Time Flies" set is added and the grad card is complete!

This challenge began on Monday, so head back to the Woodware UK blog for previous graduation inspirations.

Thursday, February 7, 2013

A Manly Ruffled Heart?


 I have been soooo busy preparing for my trip to the UK beginning next week, that I almost forgot to make the hubby his Valentine card! So, in the Pampered Stamper's usual fashion...I'm going to kill two birds with one stone (what a ghastly expression!).

Fortunately for me, this month's challenge on the Dream It Up! blog is "Love and Friendship", and since most cards are for those reasons, there should be no excuses for YOU not to play along this month. Hint, hint...there are prizes involved!

I chose to play with the newly-released Ruffled Heart, and for that manly touch, I added an ink-distressed and machine-embossed Houndstooth background.

For the center of the heart, I pieced in a section of Woodware UK's new background design by Jane Gill...Men We Love. Stamped with Jasmine Mixed Media ink from Clearsnap on black cardstock, it has that oh-so-trendy chalkboard look for added punch.

Now go hop around to the Dream Team blogs today, and be prepared to feel the "love and friendship". Then go off to your crafty space and create something full of love and hearts and mush for all of your sweet someones...and then link your creations to the linky tool on the Dream It Up! blog. Or, email your pics to lynell@dreamweaverstencils.com for a chance to win a fab stencil prize of your own. Here's the team list:


Big announcement! If you haven't noticed the post at the top of the page, then go and check it out. The Dream Team is looking to add to our team. Read through the info linked there, or email me at phornschu@yahoo.com for complete info. You have until February 28, 2013 to submit your samples and details for consideration. 


Wednesday, August 15, 2012

Playing with the SCS Sketch Challenge


Yep. It's another quickie post for a quickie card following this week's Split Coast Stampers sketch challenge from Taylor Usry. I used the Stampendous Perfectly Clear Railway Set, along with the Cling Railway Poster and Cling Locomotive. I finished it off with a sentiment from the Perfectly Clear Guys and Gears set. It was so fun to create a masculine card by layering these fun elements, and took me no more than ten minutes to complete! Thanks, Taylor, for the chance to play with your sketch!