Thursday, November 26, 2015

Dreamweaver Thursday: Getting Cozy with Family and Friends

Let's all snuggle up by the fire, literally or figuratively, with our cup of cocoa, our snuggly cat or dog and/or afghan, and contemplate those we love...friends, family, fur babies, and goldfish. Well, maybe not the goldfish.

It's Thanksgiving today in the United States, a time when we are with, or think of our friends and family, and count ourselves fortunate to have them, and everything else that makes us cozy.

Sharing our blessings multiplies that warm and cozy feeling for others as well. Happy thanksgiving!

My card today features that warm and cozy feeling during the holidays, and is a quick one to create. Using this rich marsala-colored cardstock and Tsukineko® Gold Delicata ink, the steps are simple:

1. Create a 4 1/4 X 5 1/2 inch, tent fold card.
2. Place Dreamweaver I Beam stencil over front, and tape to work surface with removable tape.
3. Using a large stencil brush, rouge gold ink through the stencil over the surface to cover design all around the outside edges.
4. Cut smaller panel. Machine-emboss the Dreamweaver Stockings by the Fire stencil using your favorite embossing/die-cutting machine. (I use the Big Shot Pro.)
5. Keep stencil in place on panel, and tape edges as in step 2.
6. Once again, rouge gold ink over the embossed surface.
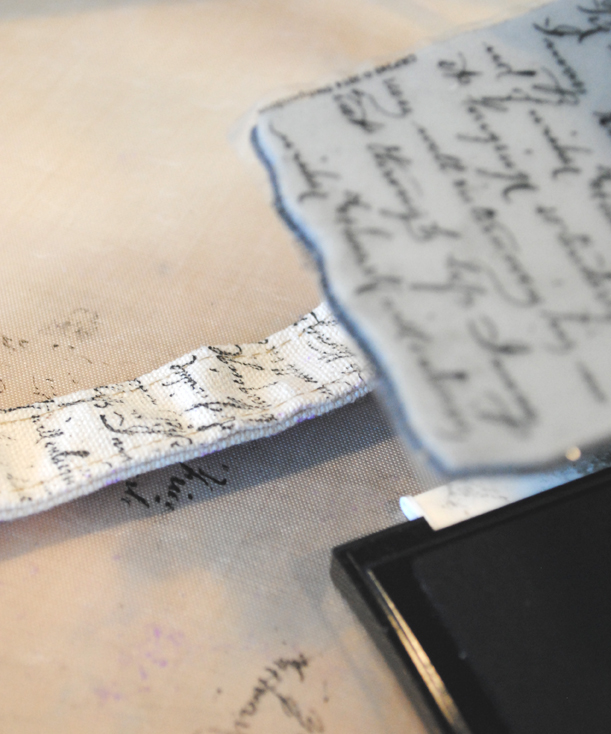
7. Use inkpad to add gold around edge. Adhere panel to card with foam tape.
8. Stamp the sentiment from the Joyful Phrases Perfectly Clear set sentiment in gold ink, and emboss with Stampendous Detail Gold Embossing Powder on vellum strip*. "Fish-tail" cut one end. Score and fold the top edge to wrap over the top of the panel to be adhered from behind. Tear bottom edge of strip.

*Rub a small amount of talcum powder or anti-static medium over the vellum strip on back and front before stamping and embossing to prevent static cling with the EP.


For more warm fuzzies...visit our friends...

Pam Hornschu (you're here)

Woodware: Tangles and Doodles with Stencils

Over on the Woodware Blog this week, the team has been challenged to Zentangle with stencils. Yeah. I got this. I may not be an amazing tangler, as doodling is more my forté, but I always did love this card. It was originally created for the Design Originals' Zentangle 6 book, featuring Dreamweaver Stencils.

The stencil design is called Open Bird, and is a perfect reminder of Peace, which we all could use, the whole world over.

When I tangle/doodle with stencils, I like to trace the design with my Sakura Micron pens, usually in the .3 - .5 size range. If I'm adding bolder patterning, I'll use up to a .7. I have so many great friends that are truly amazing at this art, some of which are Certified Zentangle Teachers. Someday, I'd really like to sit down with them and have them teach me some of the patterns and tricks to creating a motion-feel to the design. Until then...I doodle! Like Dorrie!


Friday, November 20, 2015

Woodware: Decoupage for a Season of Joy


The Woodware team is playing with the art of decoupage this week, with a Christmas holiday theme, so I thought that I'd share one of my favorite projects featuring Dreamweaver and Stampendous products. The base of this is a plaque made of slate, to which I used a decoupage medium to adhere a torn section of music score paper...


Then I added a wash of blue paint over the top, letting the music show through...


I taped the Dreamweaver Season of Joy stencil on all sides, and used Regular Embossing Paste with my Spreader tool to smooth the paste over the design...


The wet paste was covered with Stampendous Multi Crystal Glitter, and the plaque was set aside to dry...


I added a "snow bank" of dabbed-on paste, and covered this with glitter before drying...


Next I trimmed the back of a craft store tree to make it lay flat, dabbed white paint on it, and sprinkled glitter...


A bit of paint wash on a torn strip of music score before wrapping it around the tree, and adhering it to the plaque...


Paste was dabbed on a pine cone and glittered before adhering to the plaque along with a yummy bow, and a few Mark Richards' Crystals on the star, and here's the result...


Pretty gorgeous, don't you think? And what a wonderful seasonal gift!

Thursday, November 19, 2015

Wobbling Again with Dreamweaver and Action Wobbles

AWBanner

I seriously challenged myself this week to incorporate the Action Wobble with Dreamweaver Thursday, and mix in "the fat man with the beard". How did I do? First, I used the Dreamweaver Santa stencil, machine embossed twice on Core'dinations' Chalk Core Red cardstock. The embossed areas were sanded to reveal the design in a chalk board fashion. I added a panel of red Core'dinations which I machine-embossed using the Dreamweaver Stripe/Plaid stencil before sanding to reveal the plaid design.


And then I added the Action Wobble...


I cut out the second Santa head...


Adhered the self-adhesive gadget, and...


So. Much. Fun!


Here's what the crew has been up to...

Stampendous Blog

Kristine Reynolds (Wobbles, DW, and Santa)

Pam Hornschu (Wobbles,  DW, and Santa)

Laura Drahozal (DW and Santa)

Louise Healy (DW and Santa)

Pam Bray (Wobbles,  DW, and Santa)

Lea Fritts (DW and Wobbles)


Wednesday, November 18, 2015

Wobbling Again with Stampendous and Action Wobbles

AWBanner
The holiday season has only just begun, and the Stampendous/Dreamweaver team is already feeling wobbly! No...not from too much Christmas "Cheer", but from playing with these cute little Action Wobbles...


They look pretty boring, don't they? But they can make your projects spring into action with the tap of a finger! Suddenly your ho hum project becomes snow fun...like mine...

I used the Cling Snowglobe Gift image (which I'm sorry to admit that I really didn't care for when I first received it) to create a fun sticky note pad cover as a little gifty for friends (or for Santa to keep track of those naughty and nice lists). Stamped in Tuxedo Black Memento, the image was colored with Spectrum Noir Colored Pencils, and blended easily with gamsol and a paper stump.

 The snowglobe portion was stamped and colored twice, with the extra to be used as my Action Wobble element. The bottom of the spring was self-adhered to the main image, and the top was self-adhered to the underneath of the extra globe. So, with a flick of a fingertip, you get this...


I die cut three graduated sizes of Spellbinders® Grand Labels One from tagboard (bottom), aqua Bazzill Basics, and then pink Bazzill Basics (on the top). The pink piece was machine-embossed using the Stampendous/Dreamweaver Christmas Borders Embossing Folder, and Cardinal VersaMark ink was swiped over the embossed surface to highlight the design. A slit was cut across the top of this piece for the next step.

The image was cut around the outside with a bit extra at the top which I scored and folded 1/4 inch apart. A bit of Zip Dry glue was spread across the top before inserting in the slip of the pink piece, leaving that 1/4" gap of fold for the sticky note pad to be adhered underneath.

The tagboard layer was covered with a wash of white acrylic paint, and covered with Crystal Micro Glitter around the edges while still wet. To make sure that the glitter would adhere, I sprayed a mist of Krylon Crystal Clear Finish over the top.


When dry, all the layers were adhered, and the top embellished with a crinkle ribbon bow made from May Arts ribbon. Magnets could be added to the back to attach to a fridge or file cabinet, or the gifty can be left as is to set on the workspace...always at the ready for adding that nice...or naughty...person's name. Oh, and in case you were wondering...I love this Snowglobe Gift stamp image now! How about you?


To shake things up some more, here's our wobblers for today...

Jamie Martin (Wobbles)
Louise Healy (Wobble and Santa)
Pam Hornschu (Santa, Wobble and DW)

Saturday, November 14, 2015

Woodware and the White Fluffy Stuff!


The Woodware team are embossing in white for this week's challenge, so of course, I just had to go with plenty of Dreamweaver Glossy White Embossing Paste for a super snowy scene. In order to make the embossing really pop, I started with a glossy white cardstock panel that I'd placed in a puddle of Color Solutions Alcohol Inks (Iceberg and Sugarplum) on my craft mat and spritzed with Thinner. When dry, I paste-embossed the Season of Joy stencil design, and covered the wet paste with Stampendous Multi Crystal Glitter Mix, and set it aside to dry.

The words were pasted on a strip of vellum, and covered with elements from the Stampendous Winter Micro Glitter Kit. The base of the card features a panel of white cardstock, machine embossed both horizontally and vertically with the Dreamweaver Stripes/Plaid stencil after swiping ColorBox French Blue Chalk ink over the stencil each time. This works as an ink-press technique.

The panels were matted and layered, and a blue rhinestone crystal was added to the star in the design.


The rest of the team will be sharing their version of this challenge all of this week, so be sure to check them out on the Woodware Blog.

Thursday, November 12, 2015

Dreamweaver Pocket to Go with Canvas Corp!


Yes, it's hop-time once again. This time we're playing with these cute little canvas totes from Canvas Corp. As usual, there are prizes up for grabs...like these...


All you need to do is check out all of the blog posts from our amazing team, the Stampendous Blog, and the Canvas Corp blog as well. Leave comments along the way. (See Official Contest Rules.)
I'm sharing a tutorial of my project for today...


Though I didn't use my Chameleon markers for this project, I wanted you to see what a great tote this is for carrying your markers or other crafty items with you. Here's what I DID use:

Stampendous Vintage NoteDreamweaver Stylized Dahlia Stencil and DieDreamweaver Crusade BackgroundDreamweaver Waves and Dots stencilDreamweaver Matte Black Embossing Paste • Onyx VersaFine and Purple Radiant Neon Re-inker from Tsukineko®Fast Finish DecoupagĂ© and Zip Dry from Beacon Adhesives®Canvas Corp® Small Canvas ToteHemptique Variegated Cord • black pom pom trim • black pom poms • muslin and scrap patterned fabrics • buttons from Buttons Galore & Morepalette knife • paintbrush

Step 1: Tape stencil to surface. Spread paste smoothly over design. Remove stencil to clean. Set tote aside to dry. (Note: Insert something firm in pocket before pasting and stenciling.)


Step 2: Mix a few drops of re-inker with a small amount of Fast Finish. Coat muslin scrap, and let dry.
Step 3: Stamp Vintage Note with Onyx Versafine. Apply heat tool to set ink.
Step 4: Coat scrap of patterned fabric with Fast Finish. Let dry. (Coating with FF makes it easy to die cut later.)
Step 5: Die cut flower from the purple fabric, and leaves from patterned fabric.
Step 6: Brush Fast Finish over pasted sections. Place die cut pieces, and brush over surface to seal. Let dry.
Step 7: Mix small amount of FF with re-inker, and daub with paintbrush over background and back of tote.
Step 8: Place die over the top of design to mask while daubing paint. Let dry.
Step 9: Place die over design again. Place Crusade stencil over top.
Step 10: Ink stencil with large stencil brush and Onyx ink. Use heat tool to set ink. Repeat on back of tote with background stencil only.
Step 11: Adhere extra scraps on front with Fast Finish. Adhere small pom poms with Zip Dry.
Step 12: Adhere pom pom trim and strip of patterned fabric to tote with Zip Dry and Fast Finish respectively.
Step 13: Tie cord through buttons as desired. Add drop of FF to hold bows. Adhere buttons with Zip Dry.
Step 14: Stamp Vintage Letter with Onyx ink along one side of strap. Heat set ink.
Step 15: Mix a bit of FF and re-inker again, and daub through Waves and Dots stencil along other side of strap. Let dry, and adhere more buttons.


Leave a comment below, and head on to today's posts from the team...

Pam Hornschu (you're here)