Monday, November 28, 2011

Blog Candy Winner and Wisemen Lantern


Today's post features another one of my lanterns. This one was created for the Stampendous holiday 2011 catalog. I used Thermo Acetate to form the cylinder shape. The Wisemen image was stamped on the front with Black StazOn ink. On the back of the acetate, I played with lots of gooey stuff! I squirted a generous amount of Ranger Glossy Accents over the acetate. Then I added drops of various colors of Ranger Alcohol Inks, swirled a bit with my finger, and sprinkled with the Frantage Elements Mica Flakes. Then I took the thin white tissue that comes with the acetate, crumpled it up, smoothed it slightly, and applied it over the wet goo. The whole thing was set aside to dry. Once dry, the panels were attached at the sides with brad fasteners to form the cylinder shape. Ordinary rope was covered in Versamark ink and embossed with Aged Gold Embossing Enamel and glued around the top and base of the lantern. A vellum cylinder insert was edge punched and inserted for more opacity in the lantern. A few small flameless candles were tucked inside.
For Saturday's post, I promised to give away blog candy to one commenter who had the correct answer to my question, and the winner of the Cling Jumbo Santa Believe set was...
  
craftymom205

Congrats! I'll be emailing you for your address and sending this off to you via snail mail right away. Have fun creating cards, bags, tags, gifts, etc. with your new set! 
To the rest of you, keep checking back each Saturday as the team will be offering more blog candy this month. Have you played along with the November challenge to use chipboard on your projects? Be sure to link them onto the Stampendous Impressions' blog in order to be considered for winning the prize for the month...the new Cling Jumbo Songbird! Saturday, December 3rd, will begin a whole new challenge to play with! See you then! 


Saturday, November 26, 2011

It's the Holiday Season...FUR Real!


 Blog Candy Alert! However, you need to read through today's post to get the opportunity! There will be a quiz!
The thing about working in the paper-crafting industry, is that you end up thinking about Christmas about nine months out of every year. All the sample designs need to be created months in advance in order for stores and customers to have the time to purchase the latest must-haves for the holiday season. This card is a great example of this. I created this card back in June for the Stampendous Holiday 2011 catalog which was released in July. Fortunately, I love designing for the holidays...especially when I can use my favorite furry feline, Fluffles. Fluffles is known for continually getting into mischief (like most cats), and once again, there he is...in trouble. He and his pal are cohorts in crime as they attempt to steal the goodies out of the Class A' Peel Jumbo Velvet stocking. (By the way, this stocking sticker was applied to a white cardstock panel and both were run through the Big Shot with a Cuttlebug Embossing Folder to add a dotted swiss texture.) Both "cat burglars" were stamped, colored with Copic markers, and cut out, in order to be precariously perched together above the stocking. Another Velvet Class A' Peel design, the Stackable Trees pops off the fun red patterned paper along with the appropriate sentiment, "Just droppin' in to say...Meowy Christmas". As I'm sure you are well aware, the holiday season is officially in full force now, and Stampendous is chock full of wonderfully beautiful and humorous images, products, and ideas for creating the perfect holiday gifts, cards, tags, bags, and boxes. For more inspiration, visit the rest of our Stampendous "elves" listed at right, as well as the Stampendous Impressions blog. The team have been very busy this month creating with chipboard, and we are challenging YOU to play along...create your own, post it, and link it to the Stampendous blog. You can enter as many times as you'd like, and one lucky winner will receive the Cling Jumbo Songbird image seen here:


So, do you think you read my post carefully? Well, if you did, you'll know the answer to the question below. Add your answer (along with your email addy) to the comments below to possibly win this fabulous Cling Jumbo Believe in Santa set:


Here's the question:  Who is my favorite furry feline?

Friday, November 25, 2011

Skip the Mall...Shop the GRS Site!


The Gourmet Rubber Stamps team are busy cooking up some fun with the latest Diner's Club set due to be released on December 1st, called "Let's Celebrate".  As usual, this set is full of a variety of fun images...birthday themed, New Years themed, and just because themed! My card features images from this last category. I instantly fell in love with the little Matroyshka doll. I have always loved these and have a few that I display during the holidays. I love how they nest one inside the other, and are decorated so beautifully with these traditional folk art designs. One of these designs is the cute flower motif which I stamped three times across the border at the top in Danube Blue Memento ink. I paper-pieced my doll in shades of blue and green, used Copics to color her sweet little face, and added white gel pen to the details of her dress and apron. The sentiment is perfectly in tune, as it says, "It's what's inside that matters most", so true! While you are still enjoying your turkey-induced coma from yesterday, I suggest you skip the Black Friday sales, and just head on over to the Gourmet Rubber Stamps website and sign yourself up to receive the Diner's Club set on a monthly basis, or have a wild shopping spree! The first 50 customers on the site today will receive a free stamp with their order! On top of that, many of the images are on sale for 25% off! GRS carries seven different stamp lines, including Lizzie Anne Designs. I guarantee that you'll want them all! For more inspiration, be sure to visit the rest of the team's blogs:


Thursday, November 24, 2011

Simply Thankful


 Happy Thanksgiving! Today I am very grateful for the piles of crafting supplies that I have that made it easy for me to complete this card quickly. The Dreamweaver Stencils' Team challenge was the theme of Thanksgiving. I had grand plans for this card. The other night I paste-embossed the Fall Borders stencil with Matte Black Paste, and sprinkled three colors of the Metallic F/X over the wet paste...Cocoa, Kimono Red, and Ivy Garden. This is so simple and the effect is so pretty...shimmery pops of color against the black surface, especially since I used copper Star Dream cardstock as the base for this. I set this aside to dry overnight with plans to emboss a background and possibly foil a sentiment to go with. Alas, time was not my friend this week. Tuesday the family went to the Auto Show at the Los Angeles Convention Center, where we spent hours oohing and aahing over all the latest and greatest  vehicles. By the time we got home it was quite late and I was exhausted. I got up fairly early yesterday intending to get the house prepared for Thanksgiving and finish my cards...which I did. However, I had to take the easier route for this card. Fortunately, I had some great fall-themed paper, ribbon, and chipboard sentiments that I could throw together in a hurry. I refuse to feel guilty about taking the easy way out! That's what is so great about the creative process...you can go as CAS or involved as you want. That's what all that stuff is there for...and I was really thankful for it this week! Hope your Thanksgiving is simple, relaxing, and full of family and friends.  The Dream Team (listed at right) has been busy this week creating more Thanksgiving wishes for you to check out, as well as the Dream It Up! blog, which happens to feature another card of mine. On a bonus note...only six more days to submit your creations for the Dream Team call. Go check out all the info! We'd love to have you!

Tuesday, November 22, 2011

Ho Ho Ho and a Cup O' Joe!


 Quickie post today featuring the Ho Ho Ho Santa from the Murray's Law line of stamps from Gourmet Rubber Stamps. I love this line as they are full of sarcastic and cynical humor...the best kind. For this card, I created a pocket on the front of the card that will hold a gift card for a local coffee/tea/cocoa place (in my case...Coffee Bean & Tea Leaf). I have several more of cynical Santa, so be expecting to see more of him in future posts! Meanwhile, you can check out the entire line on the GRS website, along with several other lines including Lizzie Anne Designs.


Sunday, November 20, 2011

I'll Have a Blue Christmas Without You

Today is my day on the revolving wheel of Woodware to post for this week's challenge...to Pick a Color and Stick With It! Obviously, I went with blue, and am still in holiday mode as I need a few more cards to complete my card list for this year. This card features the Dreamweaver Stencils' Oval Ornament and Kaleidoscope which layered together to create the ornament shape with the Kaleidoscope pattern. I taped the Kaleidoscope stencil under the Oval Ornament stencil before taping them both down on my textured cardstock with removable tape. With a "sludge mix" of Glossy Blue and Regular White Embossing Pastes, I spread the color over the stencil, removed the excess, and set the panel aside to dry after removing the stencil. Be sure to clean the stencils right away with a little warm water and a nail brush. While the paste was still wet, I poured Stampendous Midnight Blue Glitter from the Holiday Tinsel Glitter Kit over the pasted image. The paste takes around thirty minutes to dry (about half that if you place it on an electric griddle set on low). Meanwhile, the card was formed from medium blue cardstock, with a panel of patterned paper which mimics the Kaleidoscope design rather well. To emphasize this, I stenciled the pattern onto the panel using the deep blue shade from the ColorBox Chalk Ink "Chocolate and Blueberries" set. The pasted panel was adhered to the card, a Stampendous Star Greetings sentiment was added, along with a sheer ribbon bow, and a Dreamweaver Stencils' Embellishment Pin coated with the same deep blue ink inserted through. (Be careful to ensure the pin point is tucked under the layers of paper.) If you haven't been to the Woodware UK blog yet, check it out, and while you are there, follow the links to the rest of the team of Woodware wonders as they complete this challenge in their own unique and colorful way.


Saturday, November 19, 2011

The Chipboard Challenge Continues...


 We are into the third week now of the Stampendous November Chipboard Challenge. The team has been showing a variety of ways to highlight Stampendous images and products with chipboard elements. For my cards today, I used the Painting With Powder Technique on my chipboard ovals. The ovals were covered with Versamark ink before pouring Periwinkle Embossing Powder over the sky area, and White Embossing Powder over the area that will include the snow families and their snowy domain. After this first layer has been melted and cooled, talcum powder was rubbed over the surface to prevent EP from the next step from migrating. Then I stamped and embossed in black images from either the Perfectly Clear Winter Warm or Perfectly Clear Snow Place sets, and flakes from either set embossed in white in the sky. Using a glue pen, I applied Shaved Ice Frantage Elements and Apple Red Glitter. Using plain white cards with embossed panels, I adhered my chipboard ovals over another embossed panel and both to the card. The sentiment was simply Class A' Peel Holiday Greetings in Mirror Red. The sentiment from the clear set was stamped on the inside along with a few more flakes. We are challenging YOU to play along with us this month, and link your creation to the Stampendous Impressions' blog by December 1st, for an opportunity to win the new Cling Jumbo Songbird. Need some more inspiration? Here you go:

 
While you are visiting the Stampendous blog, be sure to check out our latest group of BlogStars! Also, did you know Stampendous is offering FREE shipping on all orders $50 or over (to US/APO/FPO addresses)?! Use the promo code FREESHIP and stock up on some goodies!!  And if you are in Southern California, make plans to stop by the new Stampendous Outlet store!


Thursday, November 17, 2011

DW Sketch #12-Thinking Upside-Down


Ever looked at something in a different way? Not quite the normal way? This week as I worked on the Dreamweaver Stencils' Dream Team sketch challenge provided by Wendy, I did just that. Her sketch as seen to the left, was straightforward enough, and I quickly had my elements stenciled, cut out, and ready to be assembled. That's when I looked at the gorgeous new Christmas Tree stencil...upside-down! I've loved this stencil since it was released at CHA in July. Fun borders that mimic Icelandic sweater patterns...so fun that I begged Lynell to come out with an entire background of these patterns. (Maybe next year? Please?) I wanted to add just a little interest in the background on my card ('cuz you know I have a hard time with CAS!), and noticed the little wedge next to the angled panel, and got the idea of stenciling the tree upside-down to fit into the space. I flipped it right-side-up on the right side to balance it out. These were simply stenciled with Splendor Magic ink using the larger brush to cover more surface area with ink in a quicker timer period. The sentiment panel also features a portion of the same tree along with the small Happy Holidays. The stockings were from the Stockings by Fireplace and were paper-pieced with cute papers from WeRMemoryKeepers. With the deeper tones and plaid patterns, this card would work well for the men on your Christmas card list and their families as well.  Now it's going to be fun to see what the rest of the team have done with Wendy's sketch. Let's go check them out, along with the Dream It Up! blog as well:


 Want to show us what you've got? Bring it on! Post your creation to the Mr. Linky on the Dream It Up! blog...then keep on going! We have a design team call out right now until November 30th. You can find all the info HERE. This is a great opportunity to take your creativity to another level!


Tuesday, November 15, 2011

Would You Be Looking for Woodware?

If you are here for my Woodware UK post, please scroll down, or click HERE!

GRS is Cooking Up Some Fall Challenge Fun!


Today is our first team challenge post with Gourmet Rubber Stamps. Our challenge for November was to be inspired by the photo above. The card that I created features an image entitled "Fall", from the Marsha McCarthy line from GRS, simply stamped in Rich Cocoa ink on this softly patterned paper from Best Creation. This paper was used as the background as well, and is softly mottled with several of the shades in the challenge palette. A "Fanciful Flourish" from the Lizzie Anne Designs' line was stamped in the upper corner. The "Gratitude" sentiment from LAD "Everyday Sayings" was stamped on a panel from Memory Box. To highlight the fall theme, I punched a border in kraft cardstock with my EK Argyle edger, and layered a Creative Impressions Leaves strip over the top. My favorite touch in the inspiration pic is the hint of aqua on the acorn and leaves, so this became the card and mat color for the card. Be sure to check out what the rest of our team (including our two newest members, Joy and Kelli!) have created for the challenge. I always love to see what a different take others come up with on these challenges. Come play along, we'd love to see what YOU come up with as well!
And, bonus! All the Gourmet Rubber Stamps are on sale 25% off for "Black November"! How fab is that? While you pick up some stocking stuffers, or great sets for creating your holiday cards, tags, etc., sign yourself up for the monthly Newsletter and the Diner's Club. Or, send out a not-so-subtle hint to your loved ones that you would love to have that for a holiday gift this year!


Monday, November 14, 2011

Going Traditional with Woodware UK...Maybe...


 This is a happy day for me. Last week I was invited to be part of the Woodware UK Design Team. If you are not familiar with Woodware, they are a distributor in the UK of craft labels predominantly found in the US. Fortunately for me, they carry a huge selection of both Stampendous and Dreamweaver Stencils' product lines. A couple of months back, the Woodware UK team collaborated with the Dreamweaver team on a blog hop. It was a great learning experience on both sides of the pond! Now I get to play with the WW team some more.
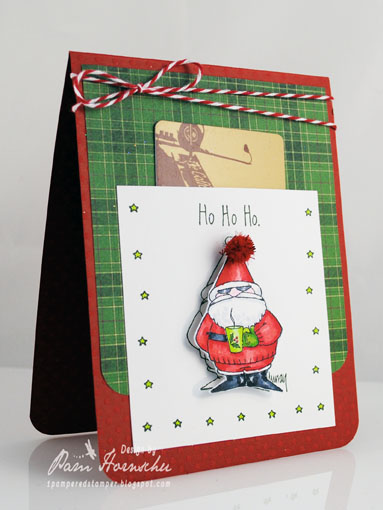
For my post today, the weekly challenge was for traditional Christmas. Now, if you've been reading my blog for any length of time, you know that I normally do not do really traditional, but this card came close. The focal point of the card is the Holly & Swirls stencil from Dreamweaver Stencils, which I love, love, love! The panel was created at CHA Summer in Rosemont, Illinois, in July, as part of a demonstration I was doing in our booth of the double-glitter technique. Normally, our Dreamweaver Stencils' team sweetheart, Laura Drahozal, demonstrates this as she is the queen of the double-glitter technique, but that day we gave her a short break. The Double Glitter technique normally goes like this:

1) Cut piece of Double-sided Adhesive as desired. Remove carrier from one side and save.
2) Adhere adhesive to panel of cardstock (in this case, white). Remove the other carrier sheet.
3) Using Hawaiian Soap bar, cover back of stencil thoroughly*. Use a soft brush to remove any bits of soap from inside the image area. Place Holly & Swirls Stencil soap side down on your adhesive panel. Use saved carrier sheet (not your fingers) to press stencil into place.
4) Carefully pour the Stampendous Emerald Green Jewel Glitter over the leaf and stem areas** and use your carrier again to press and rub the glitter into the spaces for great coverage. Brush off excess glitter and save.
5) Carefully add Stampendous Red Jewel Glitter where the holly berries would be**, rub in, brush off excess. (Note: Be careful to brush away all excess glitter!)
6) Remove stencil from the adhesive panel (soap will wash off easily with water...because it's...soap!)
7) Pour Stampendous Multi Crystal Glitter to cover background areas. Rub in with carrier sheet, brush away excess and save.

So, you noticed that before the directions I had said that normally this was the process? However, this was one of those cases where the expression, "Mistakes are just opportunities for embellishment", is so true. If I had been more careful, I would have realized when I placed the stencil down, that there was still sticky area uncovered and just waiting for unintended glitter to migrate over there, which is what glitter does best. I should have masked off those areas with the carrier sheets, but I forgot. Now remember, I was demo-ing this process. Have to make it look good...what can I do? What any self-respecting paper crafter would do! I added more colors of glitter in those areas to appear intentional. In the end, I liked it better that way! But if you are a purist, follow all the directions. In my demo, I also showed how you can use the Dreamweaver Stencils' Picasso to mask off areas as you stencil various colors of Tsukineko's Splendor Circus ink pad to add shading and highlights to the glittered panel.
To complete the card, I cut around a couple of the leaves and pulled them up for dimension, before adhering the panel to my layered card. A Stampendous sticker sentiment, some yummy red rhinestones, and pretty sheer ruffled ribbon completes the card.

The Woodware UK Design Team posts six days a week on a revolving schedule, with challenges for each week. So be sure to check out the Woodware UK blog to visit the rest of their super-talented team!

*Soaping the stencil prevents the stencil from sticking permanently without leaving residue that glitter won't stick to.
**A trick for placing glitter where you want it is to cut a drinking straw at a sharp angle, and use this as your "spoon" to apply your glitter.

Saturday, November 12, 2011

'Tis the Season to be Encrusted!


Welcome to the Stampendous "Fran•tage Encrusted Jewel Hop"! All of us on the Stampendous Design Teams are sooo excited about this new technique...an accidental creative process discovered by our own Fran Seiford, Chief Artistic Officer at Stampendous! There is a quote that says, "There are no mistakes, just opportunities for embellishment!" How true is that? Today our super-creative-with-mistakes designers are excited to show you how you can deliberately create with gorgeous sloppiness. For more info on the process of Encrusting with the Fran•tage Essentials, check out the YouTube video HERE. Here's the list of our Encrusted Hoppers for today:


As you hop from blog to blog, oohing and aahing over the Encrusted Jewel fabulousness, be sure to leave some love (and your contact email) for the designers, as well as on the Stampendous blog. Your comments are your insurance that you have an opportunity to win one of four blog candy goody boxes* of Stampendous Fran•tage Essentials for you to create your own Encrusted Jewel goodness:


 Aged Black Prize Package

Aged Silver Prize package

 Aged Gold Prize Package

 Shabby White Prize Package

For my post, I'm featuring this "Precious Gifts" Box, which was created for the Stampendous holiday 2011 catalog. Technically, I think it even works for this month's "Chipboard Challenge" since the box was created from chipboard. Lol. Hey, works for me.

Okay, so it may not be gold, frankincense, and myrrh, but the bottles hold some yummy scented bath products...bath oil, bubble bath, and bath salts. The box started out as paper mache before I started painting it, Fran•taging it, and gilding it. The border around the box was done with the Stampendous Antique Embossing technique. The "brass" name plaque on the front was simply a metallic gold cardstock die cut. "Precious Gifts" was embossed in the Aged Gold Fran•tage Elements before a bit more smudging and aging was added.

The inside lid of the box was also stamped and embossed using the Aged Gold. Love that! Slightly chunky, not too shiny, gorgeous texture. Yummm. The bottles were decorated by covering the tops of the cork lids with Versamark and Aged Gold. The outsides were spritzed with Tsukineko's Goosebumps...a wet and sticky almost gel-like substance that dries leaving bumpy droplets. Before drying you can sprinkle it with any of the Fran•tage Elements...in my case, I used the Gilded Mica Flakes. The tags were also painted and smudged before stamping with the each of the bottles from the Cling Three Gifts image. The bottles can be filled with recipes found on the internet, or pre-purchased items, or even items for the kitchen...flavored oils and vinegars, and fancy sea salts. To be truly creative now, you can't just get inky...you need to get Encrusted!

*US winners only, please.