Thursday, July 9, 2015

Tree Hugging for Dreamweaver Thursday

If you've been a Harry Potter fan, then you know where my inspiration came from for this card. Since the Stampendous/Dreamweaver team are focusing on trees this week, I thought this would be a perfect time to post this unique card. I've said it before, and I'll say it again...if it's flat, I'll stamp or stencil on it (and in many cases, even if it's not flat!). I stenciled the Dreamweaver Buck on a piece of bark from one of the birch trees in my front yard, using Clearsnap Mixed Media inks, and a good stencil brush. To make it pop a bit more, I traced it in a fine black marker, and added some darker ink around the outside. To make the piece more sturdy, I adhered it to a panel of black cardstock using Beacon Zip Dry® adhesive. The kraft card base was ink-stenciled as well using the same inks with the Dreamweaver Bare Trees.


For more tree-mendous inspiration, head on over to the links below:


Wednesday, July 8, 2015

Frolicking in the Forest with Stampendous

The new Stampendous Cling Pop Up Forest set of stamps and matching dies (sold separately), are so much fun to play with! Reminds me of playing with Colorforms® as a child. Lol. All you have to do is stamp the images, color them (I used my awesome set of Chameleon Markers), and match up their dies to cut each out using your favorite die-cut/embossing machine. To add to the charm, I used the Stampendous Pop Up Die set to enable me to add more dimension to my creation as you can see in the side view pics. Gotta love the perfect sentiment for this card as well! Whoooooo wouldn't love this fun pop up card? It's clever like a fox, and not too squirrelly. Just a forest of fabulosity!

Be sure to visit the Stampendous blog all this week for our "Go Climb a Tree" event!

Thursday, July 2, 2015

By the Sea with Dreamweaver and Me!


I'm on vacation at this time, taking an Alaskan cruise, and sightseeing in Vancouver, Canada, as well. So, this will be a quickie! My card today features the Humu Fish stencil from Dreamweaver, stentangled and colored in aqua. The background is the Mosaic Swirls, paste-embossed in Matte Black. Across the center is one of my favorite May Arts products, the web/mesh ribbon.

Here are links to those playing for Dreamweaver Thursday:


For more Stampendous and May Arts and By the Sea fun, visit the Stampendous blog:

Wednesday, July 1, 2015

Under the Sea with Stampendous and Me!


Wouldn't this be fun? All the magic of a mermaid riding on a golden seahorse, through swirls of blue and green and branches of coral!

I tried to capture that feeling with this "window on the sea" card. I die cut a window on the card front, stamped the Cling Coral Tree with Black StazOn ink, and added sprinkles of Crushed Glass Glitter.

The inside was the Seahorse Ride image stamped with Tuxedo Black Memento, and colored with Chameleon Markers, on the Stampendous Mixed Media White cardstock.

The final touch was the Dreamweaver Nautilus, machine embossed on orange cardstock, brushed with ink, cut out and adhered to the front along with an ink stenciled oval of the Nautilus and the Cling Near the Sea sentiment from Stampendous.

For more inspiration, visit the Stampendous blog.

Monday, June 29, 2015

Woodware: Friendship

This week the Woodware Team is all about celebrating friendship. The card I'm posting is in honor of my good friend, Dorothy Adam, who lives in Scotland, works for Woodware UK, is in  charge of our blog team, and an awesome person. So much fun and funny packed into one person. Her favorite color is purple, and this card has plenty of purple!

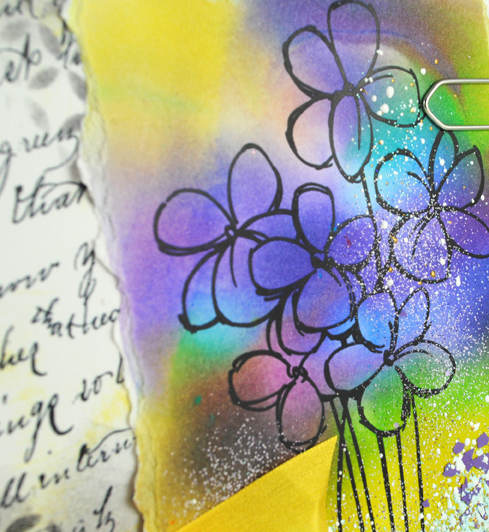
The base card is a deep muted purple, ink-stenciled with the Dreamweaver Small Cathedral Window stencil. Two panels have been added...one has been stamped using the Stampendous Cling Vintage Note, and a bit more of the Cathedral Window stenciled on its corner. The second panel was created using the Stampendous Creative Palette. Various drops of Dreamweaver Color Solutions Alcohol Inks were dropped on the surface of the palette, and thinned with the blending solution, which encourages the inks to swirl and combine a bit. The colors that I used for this were Iceberg, Lemoncello, Sugarplum, Mojito Green, and Cosmo Pink. I placed a panel of white cardstock over the surface to transfer the beautiful colors, and set it aside to dry. I sopped up a bit of the yellow onto the previous panel so that the rolled corner would be bright and sunny. Once dry, I stamped the Stampendous Cling Blossom Bunch in black ink over the surface of the focal panel. I Fran•tagéd it a bit by sprinkling Stampendous Shabby Blue Embossing Enamel and Amethyst Color Fragments together, and heated from underneath for unique texture.

I have these fun colored file clips from a local office supply store that I used to add the "Life is better with friends" sentiment from the Perfectly Clear Life Words set. A beautiful yellow silk bow was my final touch!


Thursday, June 25, 2015

Dreamweaver Thursday: Fairy Fun

I'm feeling fairy fabulous presenting this post today. I was really pleased with how this turned out. I traced and colored the Dreamweaver Fairy stencil onto Stampendous Mixed Media White cardstock, and colored and shaded her with Derwent Inktense pencils, keeping the look extra wispy for a more ethereal appearance. I used a wet paintbrush to pull the wisps out further, and then used a glue pen to adhere Stampendous Micro Glitter.

The card base was created with Bazzill Dotted Swiss in a teal color, with an acetate insert on which I stamped and embossed in black one of the Perfectly Clear Life Words sentiments. (Hint: When embossing on acetate, I like to wipe both sides with a small amount of talcum powder as an anti-static medium. This keeps the EP from sticking anymore besides where intended. Just wipe off the residue after melting the EP, and you'll clearly see a difference!) I stamped and embossed two Stampendous butterflies on acetate from the Perfectly Clear Butterflies set (an all time fave), cut them out, and adhered them to the card with just a bit of Zip Dry glue behind the black embossing. The finishing touch was a black die cut of the Dreamweaver Petite Fern. Isn't she magical?

Now, here's your opportunity to visit the rest of our fairy fabulous Dreamweaver posters for today:

Pam Hornschu (you're here)
Kristine Reynolds


Tuesday, June 23, 2015

Woodware: House Mouse Mice Wishes

This week's challenge over on the Woodware blog is to play with the House Mouse Designs® from Stampendous. What a tough job!

Obviously these House Mouse Designs® critters are enjoying their grapes, and they're not even turned to wine yet! It was fun to color this image with markers, adding grape stains, and drops of Ink-Essentials Glossy Accents for it's wet appearance. I built up layers of colored papers, stamped a sentiment from the Stampendous Perfectly Clear Beary Mice set, and a fun gingham ribbon.