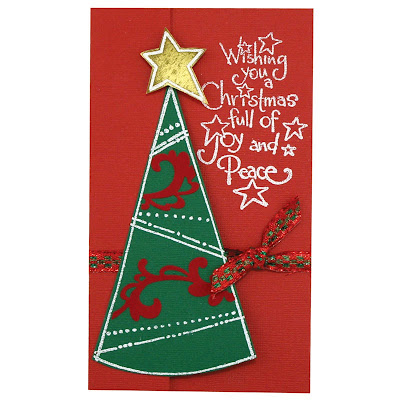
Thursday, December 30, 2010
Dream Schemes-Bubbly Hearts
The holiday season is almost over for another year, and as we prepare to ring in a new year, bright with hope and promise, I still find it necessary to celebrate the year of 2010. It's brought several changes to my life...some good, some bad, some fun, and some sad. Our Thursday Dream Scheme for this week was to celebrate "Love in the New Year". Each year of our lives is all the more enriched by those we love. My post today features a bottle of the bubbly (the real stuff or sparkling cider...your choice), a representation of all celebrations. My bottle is created from acetate. I paste-embossed in white "Heart Whimsy" on the "bottle", and in glossy black on the gold "label". The "champagne" was glitter paper, with a few "bubbles" punched out, and Dot Sparkler stickers adhered at the top of the bottle. The acetate bottle was popped up off the surface of the elegant black linen card for effect. The foil and cap at the top were created from Nesties. A clear sticker sentiment, tulle, ribbon, and a fun corsage pin from Dreamweaver finishes the card. Of course, this design is perfect to celebrate the New Year, or for a wedding, anniversary, birthday...any special event in someone's life. Dreamweaver has a wonderful variety of heart stencils to fit any occasion. Pull out your stencils and play along! Be sure to post your creation with a link to Dreamweaver's "Dream It Up" blog. We love to see your creations as well! Check out what the rest of the team has come up with to celebrate "Love in the New Year".
"Heart Whimsy" from Dreamweaver Stencils (LL599)
White (DEP) and Glossy Black (DGKP) Embossing Paste from Dreamweaver Stencils
White 3" Pins from Dreamweaver Stencils (WTIP)
Class A' Peel Black Dot Sparklers from Stampendous (AC672HSK)
Thermo Acetate from Stampendous (PC75)
black linen, metallic gold cardstock
Nestabilities Classic Ovals, Large Scalloped Ovals, and Labels Four
tulle, ribbon
double-sided foam adhesive
1/4" and 1/8" hole punches
Wednesday, December 29, 2010
Feeling the Love?
Feeling the love? Today's post features two darling images from the Perfectly Clear "Love Buds" from Stampendous. I created two versions...one for the boys and one for the girls. Each image was simply colored with colored pencils, so simple even the kids could do this portion. the bottom of the card is stamped with "Happy Day Square" in black. Portions of Class A' Peel "Girly Ribbon" is used across the centers and embellished with fun heart-shaped brad fasteners, and a snippet of ribbon. A treat or gift certificate could easily be tucked inside for that special someone. Now are you feeling the love?
Perfectly Clear "Love Buds" from Stampendous (SSC265)
Cling "Happy Day Square" from Stampendous (CRF205)
Class A' Peel "Girly Ribbon" from Stampendous (AC708MRS)
Onyx Versafine ink from Tsukineko
Prismacolor pencils
Swiss Dots Bazzill cardstock
black, white cardstock
American Crafts ribbon
Creative Impressions brad fasteners
Monday, December 27, 2010
Call Me...Resistable!
Feeling a touch of the "after-Christmas-blues" tonight as I post this blog for Monday. My hubby left this morning to go back to work. My two sons left this evening to go back home. Now it's just me and my kitties. I needed a little cheering up, so I'm posting this bright and sweet card featuring new release stamps from Lizzie Anne Designs. This rose and sentiment are from the Winter 2011 mix release, "Lucky in Love". The rose was done with a resist technique. I stamped and embossed it in white on white cardstock. I used the ColorBox Chalk ink pad in Rouge direct-to-paper over the embossed image. Then I wiped the ink away from the embossed surface to show off this gorgeous rose image. I inked a piece of screening with the rouge ink and carefully placed the rose panel over the surface to achieve the
textured appearance. The Bazzill Bling card has rounded corners, and a panel of this pretty pink and green plaid paper from Paper Adventures at the bottom. The sentiment was stamped in green on a Nestie die cut white panel. The rose was off-stamped before stamping a soft image over the sentiment. This panel was popped up over another Nestie die cut piece, and embellished with pearl stickers. A pretty satin bow completes the card. Would make a sweet card for Valentine's day, anniversary, wedding, or everyday. Hope you had a wonderful holiday with your family, and are looking forward to a very creative new year.
Winter 2011 Mix, "Lucky in Love" from Lizzie Anne Designs
White Embossing Powder from Stampendous (EP100)
Rouge ColorBox Chalk ink from Clearsnap
Tea Leaves VersaMagic, VersaMark ink from Tsukineko
Paper Adventures print
Bazzill Bling cardstock
Mohawk white cardstock
pink satin ribbon, pink pearl stickers
Nestabilities Labels Two and Big Scalloped Ovals Large
screening
double-sided foam adhesive
Friday, December 24, 2010
Stamping Sentimental: Matt's Card from December 1992
I think Christmas Eve is the perfect time to feel sentimental. This card always makes me feel that way. I have been stamping for almost twenty years now. When I first started, my boys were 4 and 5, and they quickly became stampers as well. They had their own stamps, and inks, and markers, etc., and they loved to sit at Mom's desk and make their own cards. You probably have similar memories with your children, or will create those memories in the future. They're special memories, a bonding experience with your children that time and circumstance can never take away from you, or them. This card represents this feeling for me. Matthew, my youngest, was five at the time he created this card. By then, he had watched mom go beyond just stamping and coloring, to embossing, and foiling, and glittering. He did this card all by himself. I remember him talking about it as he carefully worked on it. He drew the frozen pond and the mountains, and colored them in along with the sky. He broke out his little Disney set of stamps that included Mickey, Minnie, Goofy, and other images for a holiday scene. He stamped his trees in green, the holiday light strings across the top, the little cottage, Goofy ("rolling down the hill in a Panzer", which was a favorite expression after seeing "The Santa Clause" for the first time), and colored them all. He stamped Mickey separately, colored him, and cut him out. He wanted the pond to look icy, so he applied some glue pen, let it dry until tacky, and applied silver foil over it. He wanted snow on the hills and trees, so he used a embossing marker to color on those areas and applied white embossing powder with glitter in it, heating with the heat tool just like Mom had shown him. The final touch was popping Mickey up off the card with a little foam tape. I was amazed by this card at the time, and I still am every time I see it. He gave it to me for Christmas that year, and I've treasured it ever since, and always will. Maybe someday he'll show this card to his children, and tell them how he carefully created this for his mom. Maybe they will want to do the same. This is how treasured traditions begin. Merry Christmas to all of you, and wonderful memories for you and your family in the new year.
Thursday, December 23, 2010
Dream Schemes-Grateful Hearts
Two more days until Christmas, and those of us in the Dreamweaver "Dream Team", still have itchy stencil fingers. So, we all decided not to take the week off of the "Thursday Dream Schemes". I did, however, choose to do a super-simple card for our open challenge this week. I love the Celtic look of this stencil, which I simply paste-embossed with Glossy Black paste on a textured paint chip sample from the local home store. It has kind of a sandy and slightly sparkly texture to it, which is kind of cool, and I picked up a handful of them in various colors. The rest of the card is simply velvet Damask Class A' Peel stickers and a sentiment sticker from Stampendous. I embellished with black rhinestone stickers at the corners of my Nestie die cut square, and two shades of pearl stickers on the design. I like the sentiment that I used. Simple, to the point, yet different than the usual "thank you". The holidays always remind me to be especially grateful for my life, my family, my friends, and how fortunate I am to be able to create something beautiful every day and share this with others who do the same. For more inspiration, be sure to visit the rest of the team's blogs. Please play along by linking your own creation to the Mr. Linky on the Dream It Up! blog. We are GRATEFUL to have YOU as well!
Pam
"Hearts Knot" from Dreamweaver Stencils (LL326)
Glossy Black Embossing Paste from Dreamweaver Stencils (DGKP)
Class A' Peels "Damask Leaves" from Stampendous (AC990VK)
Class A' Peels "Tiny Messages" from Stampendous (AC963K)
DCWV cardstock
textured paint chip
rhinestone and pearl stickers
Nestabilities Scalloped Squares
Monday, December 20, 2010
Party with the Polka Penguins
I thought I was through with posting Christmas cards for this year, but I came across this one that I created for the Stampendous holiday catalog '09. It is one of my favorites, mainly because I love penguins, and I love the color scheme for this card. I took one white cardstock panel and stamped the Polka Penguins image, the sentiment, and the snowflakes. I watercolored all, and then cut the panel into three sections. Each were matted in black cardstock, adhered over this smoky blue MME paper, on a red card, and embellished with rick rack, ribbon, turn mounts, and red brad fasteners. A little glitter to highlight the frosty feel finished it off. Happy holiday stamping! Be sure to come back on Thursday for the Dreamweaver Stencil's Thursday Dream Schemes!
Pam
"Polka Penguins" from Stampendous (M172)
"Mini Flake" from Stampendous (AA014)
"Ours to Yours" from Stampendous (L190)
Onyx Versafine ink from Tsukineko
Multi Ultra-fine Crystal Glitter from Stampendous (GM220U)
Bazzill Maraschino cardstock
black, white cardstock
print paper (MME)
turn mounts, brad fasteners (Creative Impressions)
rick rack, ribbon
watercolors
corner rounder
Friday, December 17, 2010
Bag It and Tag It...Homespun-Style
Coming in to the home stretch now for Christmas. The cards have probably been sent, the decorating is done, and now you need to quickly wrap those gifts. Here is a quickie wrap using Lizzie Anne Designs, "Oh, Christmas Tree" set. This set has a variety of trees in different shapes, sizes, and styles. For this bag and tag, I wanted to go more traditional with a homespun feel. I started with a kraft bag, and added a band of DP which I had continuously stamped the sentiment namesake for this set. This was adhered to a green band, and a tan cardstock run through the Corrugator for texture. The tag follows the same process, with the addition of this old-fashioned tree stamped on the tan cardstock, cut out, run through the Corrugator, and then popped up on the die cut tag. For the tissue, I stamped the star in deep red, and the trees in dark green, and the sentiment again randomly. This would be so easy to make "conveyor belt-style" for multiples, and hand-crafted gift bags, tags, boxes, etc. really let the recipient know that you care enough to REALLY give the very best. Happy wrapping!
Pam
"Oh Christmas Tree" from Lizzie Anne Designs
Rhubarb Stalk, Rich Cocoa, and Cottage Ivy Memento ink from Tsukineko
Sizzix Tag die
kraft bag, jute twine
double-sided foam adhesive
Corrugator from Marvy-Uchida
Thursday, December 16, 2010
Feeling Blue? And Purple?
The Dream Team was feeling a little blue this week...and a little purple! Our color way challenge for this Thursday was to use blue and purple. In addition, we are using this opportunity to show off Dreamweaver Stencils' gorgeous Glossy Blue Embossing Paste. This is the same paste that I used on my porcelain ornaments that I posted last Thursday, but for that occasion it was covered in glitter. Now you can see just how pretty and shiny this paste is. I used this paste for all three background panels (Flourishes, Diamonds, and Petals) on this card, and for the Iris focal point as well. That one was a bit trickier as it is small, and to mask off the tiny areas that will be other colors would ordinarily be really annoying. However, Dreamweaver Stencils has this really cool gadget called a "Picasso". It's shaped like something you would imagine he would design, with odd angles, shapes, and openings. Perfect to block off areas while you color in others. After the Iris was dry, I sponged Memento inks over it from light to dark. I used my Nesties to frame and show off my little art square, added a sentiment clip, and this gorgeous ribbon from Creative Impressions. Unfortunately, after I completed this card, and started to type the post, I realized that the little iris has been discontinued. So...run like mad to your local store to snag the last ones off their shelves! If all else fails, check ebay! Or send Lynell a petition to reinstate that stencil! Yeah, I know. I'm going just a little overboard...again. Oh, well, now that you've read my rant, be sure to hop over to check out the fabulousness of the rest of the team as listed at right and the Dream It Up! blog, leave some love (and comments about how you desperately NEED that stencil!), before going to the Dreamweaver Stencil's site to locate the nearest store to purchase all of these stencils, including the Picasso, and that wonderful Glossy paste as well. Now, you have no excuse to play along. Please post your creation and visit Mr. Linky on the Dream It Up! blog so that we have the opportunity to view your creativity as well. Happy stenciling!
Pam
Diamonds (LG618), Petals (LJ899), Flourishes (LJ890) stencils from Dreamweaver Stencils
Glossy Blue (DGBP), Glossy Green (DGGP), and Matte Yellow (DMYP) Embossing Paste
Picasso (LL332), Palette Knife (DPK) from Dreamweaver Stencils
Paris Dusk and Sweet Plum Memento ink from Tsukineko
Nestabilities Classic Squares, Scalloped Squares, and Large Scalloped Ovals
Bazzill cardstock
Canson White cardstock
Big shot
Creative Impressions ribbon
metal sentiment clip
double-sided foam adhesive
Wednesday, December 15, 2010
Lizzie Anne Designs New Release Pop Hop!
Break out the butter and salt! It's time to celebrate with the new release of Lizzie Anne Design's January Mix, "Lucky in Love"! Like all the mix sets, this one is chock full of fun, quirky, sweet, and artsy images, with the perfect sentiments to go with. I really had a tough decision to choose which ones to play with first. I ended up going with the Popcorn Box, the Popcorn, and Popping By sentiment. It may sound stupid, but I get sentimental about popcorn. When I was growing up, a family treat would be my dad making popcorn. When we would bundle the family into the old Chevy Nomad station wagon to go to the drive-in movie, my mom would fill up old metal coffee cans with popcorn for each of us to take along. When my sons were small, I would sneak one or the other out of their beds to have popcorn as a special treat. Our landlady from those same days (who came from Iowa, and therefore, an expert on popcorn) would call the boys over to get popcorn. She was really a special lady to our family...kind of an adopted mom/grandmother to us. Anyway, now that I've shared the
mushy stories with you, I'll get back to the point of this post. Lol. I created a popcorn box from white cardstock with red stripes of cardstock. The Popcorn Box stamp was colored with Copic Markers, along with the Popcorn. I added Liquid Applique to the stamped kernels, and after puffing up, added a little yellow for "butter". This project makes a great little gift for any occasion with movie tickets/certificates tucked in, real popcorn (without the butter), and tiny candy bars. The card that I created, uses many of the same techniques...Copic coloring, Liquid Applique, and popping up with dimensional foam dots. I added a border of tiny pompom trim which I tinted slightly with a yellow marker to mimic the buttered popcorn once again. The card is that fun little something to send to someone just for the fun of it, or to maybe invite someone over for a
movie night at home. The rest of the Lizzie Anne Design Team (as listed at right) has cooked up some fun stuff with this set as well, so pop on over and check them out, before popping over to the Lizzie Anne Designs web site to purchase your own set of these great images. BTW, all the Holiday/Christmas images are on sale through the end of December!
Pam
January Mix set "Lucky in Love" from Lizzie Anne Designs
Tuxedo Black Memento ink
Ladybug and Cantaloupe Memento ink (card only)
Copic Sketch Markers
Liquid Applique from Marvy-Uchida
red, yellow, and white cardstock
red and white ginham print (card only)
pompom trim and ribbon (card only)
Nestabilities Classic Ovals (box only)
popcorn, certificates, candy (box only)
Tuesday, December 14, 2010
Jumbo Size It!
Busy, busy, busy! I don't know about the most wonderful time of the year, but it's definitely the busiest! That's why these two projects featuring the Stampendous Perfectly Clear Jumbo sets are nice and simple. The first uses a tri-fold card. The Jumbo Tree has been stamped and embossed in white on green cardstock. Velvetty Class A' Peel Scrollwork Borders are added, the tree is cut out and adhered over the ribbon tie that holds the card closed. Because it's a tri-fold card, you have a nice spot inside for tucking in some cash or a gift certificate/card. The star was also stamped, embossed, and cut out to top the tree. The sentiment was stamped on the side panel and embossed.
The second project is a fun ornament. Stamp and emboss the Jumbo Ornament in white on several green, red, and print papers. For each ornament you'll need at least five circles. Cut and piece the various colors and patterns as desired. Score down the center of each circle and adhere each to the other on sides only. Before adhering the last circle, trap and adhere a cord loop in the center. Add a multi-looped bow for the perfect festive touch. Great gift, great school project, or a great tag to add to a present.
Pam
#1-Tri-fold Jumbo Tree Card:
Perfectly Clear "Jumbo Tree" from Stampendous (SSC1016)
Class A' Peel "Scrollwork Borders" from Stampendous (AC726VF)
White Embossing Powder (EP100)
Frost White ColorBox ink
Bazzill cardstock
mirror gold cardstock
ribbon
#2-Jumbo Ornament:
Perfectly Clear "Jumbo Ornament" from Stampendous (SSC1010)
White (EP100) and Red Shimmer (EP106) Embossing Powder from Stampendous
Bazzill carstock
print cardstock
silver cording, ribbon
Monday, December 13, 2010
Fluffles and Fun for the Holidays
Another quickie post with two more holiday creations from the Stampendous holiday '09 catalog. The first is my favorite Stampendous character...and I do mean character! Fluffles is always into mischief! He and his pal are decorating this kitty treat bag with a little help from me. I cut the opening for the window of this bag (coated inside for food purposes) using my Coluzzle square template. I adhered a acetate window from the inside that had been stamped with the Festive Fluffles set. Class A' Peel "Holly Corners" and "Candy Corners" for highlighting the corners and the tag. Both cats were watercolored, cut out, with paper pieced holiday hats (and pompoms attached...as usual!), and Fun Flock as well. A strip of the cute polka dot paper was added around the bottom of the bag before filling with kitty's favorite noms.
The second card uses the same color scheme and cute papers. The poinsettia was stamped and embossed in white on red and lime papers and cut out. Several petals/leaves were cut to curve upward for dimension. More pompoms in the centers which mimics the dots on the DP. Class A' Peel velvet borders and sentiments were added embellies.
Pam
#1-Perfectly Clear "Festive Fluffles" from Stampendous (SSC1027)
Class A' Peel "Holly Corners" (AC720N) and "Candy Corners" (AC719R)
Thermo Acetate from Stampendous (PC75)
Cotton Ball (FL400) and Chili Pepper Red (FL402) Fun Flock
Black StazOn ink
red linen cardstock
polka dot print
treat bag
Sizzix tag die
Coluzzle Square Template
pompoms
#2-"Poinsettia Points" from Stampendous (W031)
Class A' Peel "Holiday Greetings" from Stampendous (AC723MRR)
Class A' Peel "Scrollwork Border" from Stampendous (AC726VL)
Class A' Peel "Dot Scallop Border" from Stampendous (AC724VW)
White Embossing Powder from Stampendous (EP100)
Frost White ColorBox ink from Clearsnap
Bazzill cardstock
polka dot print
pompoms
Sunday, December 12, 2010
Design Team Mix Up!
This posting today is a design team mix up. This card is featuring product from two of the teams that I design for...Stampendous and Dreamweaver Stencils. I love when I have opportunity to blend product from different companies into a creation. I used the Dreamweaver "Snowflakes" stencil to create the silvery panel at the base of the card. I used my Foil Technique for this:
1) Follow directions with Big Shot (or other embossing/die cutting machine) for embossing with a stencil to determine which base and plattens you will be using.
2) Place stencil on base and clear pad.
3) Place craft foil face down on top of stencil.
4) Apply spray adhesive to front of cardstock panel to be embossed and foiled. Spritz the back with rubbing alcohol (this will aid in a deeper emboss). Place adhesive side down on top of the foil sheet.
5) Place rubber mat, and second clear pad on top and run through
machine.
6) Remove layers and peel off the foil carrier to reveal the foiled and embossed panel. Ta dah! Pretty cool, huh?
Note: if you prefer less foiling, crumple up the foil thoroughly before using it.
Now, back to the rest of the card. I stamped the polar bear on white cardstock, and colored and shaded with my Copic Sketch Markers. Using a fine tipped glue pen, I applied Fun Flock, glitter, and more foil to highlight the image. I added a two different Class A' Peel borders at the top and bottom of the panel, with the foiled panel at the bottom of the card. A ribbon tie holds the stamped and embossed sentiment on an acetate tag. (For info on stamping and embossing on acetate, please read my last blog post.)
Pam
Cling "Polar Christmas" set from Stampendous (CRS2044)
"Snowflakes" stencil from Dreamweaver Stencils (LJ819)
Class A' Peel "Dot Scallop Border" in Velvet White from Stampendous (AC724VW)
Class A' Peel "Curly Ribbon" in Silver from Stampendous (AC709S)
Cotton Ball White Fun Flock from Stampendous (FL400)
White Embossing Powder from Stampendous (EP100)
Multi Ultra-fine Crystal Glitter from Stampendous (GM220U)
Thermo Acetate from Stampendous (PC75)
silver craft foil
3M Photo Mount spray adhesive
Sakura Quickie Glue Pen
ribbon
Sizzix tags die
Big Shot
Saturday, December 11, 2010
No Challenge...Just Inspiration
Sadly, we are taking a break from the Stampendous Saturday Sketch challenge until after the 1st of the year. However, I still wanted to post some sweet Stampendous inspiration. Here are two more cards from the Holiday '09 catalog. The first is highlighting the Starry Angel stamp. I created a layered window on the front of the card by punching a circle through the white card, and then stitching a square on the print paper before tearing around the edge. This made a nice frame for the image stamped inside the card that was watercolored and glittered. I love the sentiment on this card, small and simple, yet perfect. On the second card, I created another window through the dotted print paper to stamp and watercolor (and yes, glitter,
too) these snow friends. As an overlay to highlight them and add to the snowy feel, I stamped and embossed in white the Swirl Tag. (Tip: Embossing on acetate can be a bit tricky because of the static cling on the acetate and because embossing powder loooooooves static cling. If your acetate has a tissue clinging to the back of the sheet, keep it there. Rub a small amount of talcum powder on the top, or the back as well if you don't have the tissue. Then stamp your image and apply the powder. Snap the back of the image with your finger to dislodge any remaining embossing powder cling. Then go ahead and heat to melt the powder, holding the heat tool several inches away so as not to warp the acetate. When done, remove the tissue and use a damp paper towel to wipe away the talcum residue. I like using talcum for this more than the anti-static mediums and pouches that are on the market for two reasons: 1) Talcum doesn't scratch the acetate. 2) It's cheap!) So, back to the card, I finished this off with another great Stampendous sentiment and a ribbon tie on the tag. Now it's your turn to get back to the holiday stamping! Be sure to post your creations to any of the online sites. Just because we aren't doing the challenges for a few weeks, doesn't mean you couldn't possibly win the "Win Without Warning" opportunity. For more info, visit the Stampendous blog site.
Pam
#1) Torn Window Angel Card:
"Starry Angel" from Stampendous (E210)
"Family Season" from Stampendous (L187)
Onyx Versafine ink from Tsukineko
Bazzill Cardstock
white cardstock
MME Paper
ribbon, velvet rick rack
1 1/2" circle punch
sewing machine
#2) Snow and Swirl Angel Card:
"Snowy Angel" from Stampendous (F168)
"Ours to Yours" from Stampendous (L190)
"Swirl Tag" from Stampendous (M203)
Thermo Acetate from Stampendous (PC75)
White Embossing Powder from Stampendous (EP100)
Frost White ColorBox ink from Clearsnap
Onyx Versafine ink from Tsukineko
Bazzill cardstock
white cardstock
MME paper
Zots glue dot
ribbon
Coluzzle Square Template
too) these snow friends. As an overlay to highlight them and add to the snowy feel, I stamped and embossed in white the Swirl Tag. (Tip: Embossing on acetate can be a bit tricky because of the static cling on the acetate and because embossing powder loooooooves static cling. If your acetate has a tissue clinging to the back of the sheet, keep it there. Rub a small amount of talcum powder on the top, or the back as well if you don't have the tissue. Then stamp your image and apply the powder. Snap the back of the image with your finger to dislodge any remaining embossing powder cling. Then go ahead and heat to melt the powder, holding the heat tool several inches away so as not to warp the acetate. When done, remove the tissue and use a damp paper towel to wipe away the talcum residue. I like using talcum for this more than the anti-static mediums and pouches that are on the market for two reasons: 1) Talcum doesn't scratch the acetate. 2) It's cheap!) So, back to the card, I finished this off with another great Stampendous sentiment and a ribbon tie on the tag. Now it's your turn to get back to the holiday stamping! Be sure to post your creations to any of the online sites. Just because we aren't doing the challenges for a few weeks, doesn't mean you couldn't possibly win the "Win Without Warning" opportunity. For more info, visit the Stampendous blog site.
Pam
#1) Torn Window Angel Card:
"Starry Angel" from Stampendous (E210)
"Family Season" from Stampendous (L187)
Onyx Versafine ink from Tsukineko
Bazzill Cardstock
white cardstock
MME Paper
ribbon, velvet rick rack
1 1/2" circle punch
sewing machine
#2) Snow and Swirl Angel Card:
"Snowy Angel" from Stampendous (F168)
"Ours to Yours" from Stampendous (L190)
"Swirl Tag" from Stampendous (M203)
Thermo Acetate from Stampendous (PC75)
White Embossing Powder from Stampendous (EP100)
Frost White ColorBox ink from Clearsnap
Onyx Versafine ink from Tsukineko
Bazzill cardstock
white cardstock
MME paper
Zots glue dot
ribbon
Coluzzle Square Template
Friday, December 10, 2010
You GNOME You Need Tags for the Holidays!
It's a perfect time during the holiday season for a tag challenge, which is just what today's post is all about. The Design Team for Lizzie Anne Designs was challenged this month to create a tag for the holidays. I'm afraid I may have gone slightly over the top with this one. I can guarantee you that very few people get tags like this on their gifts from me! Lol. My husband and sons are fortunate if they get one of those stickers from Target* that say "To" and "From", and they probably don't even notice those! So this was my opportunity to go all out on a tag. I cut several layers of various Nestabilities shapes of cardstock and DP. If you remember from the wreath I created for the last challenge, this cutie-pie gnome (or elf, or Santa) is a favorite of mine, so I used him once again putting him in a fun polka dot outfit. I flocked and glittered his beard and added a sparkle pompom to the tip of his hat. (I love pompoms in case you haven't noticed before!) I love the vintage look of the Happy Holidays stamp, so of course, this had to be used as well. All the layers were distressed with ink around the edges and/or pierced to mimic stitching (which I was too lazy to do tonight), and the center oval was run through the Big Shot with a Cuttlebug folder for more texture. I tried several options for ribbon or cording, and finally settled on this homespun plaid as the final element. This tag could easily be simplified by leaving off a couple of layers, skipping the piercing and paper piecing. Personally, I would still add the pompom on his hat 'cuz you have to have one "oooh, cute" item! Be sure to check out the rest of our super-talented team as listed at right for more tag inspiration, and get going on creating your own. Family and friends should NOT have Target* sticker labels on their gifts...or at least not FRIENDS! :)
Pam
December Mix "Warmest Thoughts" from Lizzie Anne Designs
Rhubarb Stalk and Bamboo Memento inks from Tsukineko
Copic Sketch Markers RV10, NO, C3, E00
Cotton Ball Fun Flock from Stampendous (FL400)
Multi Ultra-fine Crystal Glitter from Stampendous (GM220U)
Bazzill cardstock
white cardstock
print cardstock
Nestabilities Large Scalloped Ovals and Rectangles, Classic Ovals
"Swiss Dots" Cuttlebug Folder
Big Shot
ribbon (JoAnn's)
jumbo brad (Queen & Co.)
double-sided foam adhesive
*Apologies to Target. Their tags are fine...really...honest. I shop there all the time. Ask my hubby. He gets the bills.
Thursday, December 9, 2010
DREAMing and SCHEMEing of a White Christmas!
It's Thursday so that means it's Dreamweaver Stencil's Dream Schemes again! Another opportunity to be wowed by our wonderful team, and another opportunity to play along and show us your stuff! Be sure to check out all the gals amazingness (is that a word? It is now!) and leave them some love, before hopping over to the Dreamweaver Stencil's "Dream It Up!" blog for more inspiration. Click on "Mr. Linky" there to link up your own creation for us to ooh and aaah over!
For my post today, I'm showing off the three porcelain ornaments that I decorated using Dreamweaver Stencils, embossing paste, and lots of glitter! The first uses a ornament shaped ornament, so of course, I used the Oval Ornament stencil! I paste embossed with the gorgeous Glossy Blue Paste, poured blue glitter over the surface, and set aside to dry. Once dry, I replaced the stencil over the ornament before placing the Gothic Snowflake over the top and paste-embossing with white paste and a generous coating of Crystal glitter. When this layer
was dry, I embellished with pearl stickers, ribbon, and jumbo snowflake sequins. The second ornament was a stocking shape, and since I have a thing for argyle socks, I used the Diamonds stencil with the Glossy Red Paste before pouring on the red glitter and setting aside to dry. Then I placed the Holly Flourish stencil over the top and stenciled a portion of that using Glossy Green paste and green glitter. Once all of this was dry, I applied a thick frothy coating of white paste to the top of the stocking, and covered with a mixture of white flock and crystal glitter. This ornament was embellished with a cheery plaid bow. The final ornament was a snowflake shape. For this one I paste embossed the Flakes Background in white before sprinkling with glitter and setting aside to dry. Then I
paste embossed the Gothic Snowflake in Glossy Blue and added the blue glitter again. Once dry, I embellished with ribbon and rhinestone stickers. I seriously had so much fun making these, and they look gorgeous on my tree. I intended them to be gifts for friends, but now...I don't know...I just may keep them for myself! So, now you've seen what fun I've been having with Dreamweaver Stencils, now you need to go visit the rest of the team as listed at right, create your own, and link your post to the Dream It up blog via "Mr. Linky".
Pam
#1-Blue Ornament:
"Oval Ornament" from Dreamweaver Stencils (LG674)
"Gothic Snowflake" from Dreamweaver Stencils (LL396)
Glossy Blue Paste from Dreamweaver Stencils (DGBP)
White Embossing Paste from Dreamweaver Stencils (DEP)
Western Blue Glitter from Stampendous (GM272U)
porcelain ornament (Michael's)
pearl stickers, large snowflake sequins
ribbon
Zots glue dots
#2-Stocking Ornament:
"Diamonds" from Dreamweaver Stencils (LG618)
"Holly Flourish" from Dreamweaver Stencils (LG731)
Glossy Red Paste from Dreamweaver Stencils (DGRP)
Glossy Green Paste from Dreamweaver Stencils (DGGP)
White Paste from Dreamweaver Stencils (DEP)
Apple Red (GM275U), Emerald (GM258U), and Multi Crystal Glitter (GM220U) from Stampendous
Cotton Ball Fun Flock from Stampendous (FL400)
porcelain ornament (Michael's)
ribbon
#3-Snowflakes Ornament:
"Snowflakes" from Dreamweaver Stencils (LJ819)
"Gothic Snowflake" from Dreamweaver Stencils (LL396)
Glossy Blue Paste from Dreamweaver Stencils (DGBP)
White Paste from Dreamweaver Stencils (DEP)
Western Blue Glitter from Stampendous (GM272U)
Multi Crystal Glitter from Stampendous (GM220U)
porcelain ornament (Michael's)
rhinestone stickers, ribbon
Wednesday, December 8, 2010
Two for the Post of One?
Didn't have an opportunity to post yesterday, so posting two cards today. The first was designed for the Stampendous holiday '09 catalog and features the Ponderosa Pine stamp embossed in white randomly over the DP. That panel was matted in red, and adhered to a soft blue-gray card. The tag is actually a stamp as well, and was also embossed in white, cut out and matted in red. The red buttons add just the right amount of pizazz to this card.
My second card today was created for this year's holiday catalog, and is soooo simple to recreate. It features the Class A' Peel velvet Jumbo Poinsettia stickers from Stampendous. Just apply them over the DP, mat the panel and adhere to the card. The sentiment was added to a matted strip, tied with a ribbon and
and adhered to the card. A few Class A' Peel Dot Sparklers were added for bling! The perfect card for those of you who are panicking about having enough time still to make your own cards.
Pam
Card #1:
"Swirl Tag" from Stampendous (M203)
"Ponderosa Pine" from Stampendous (Y013)
"Family Season" from Stampendous (L187)
White Embossing Powder (EP100)
Frost White ColorBox ink from Clearsnap
MME print paper
cardstock from Kelly Paper
buttons
Card #2:
Perfectly Clear "Christmas Wishes" from Stampendous (SSC1068)
Class A' Peel "Jumbo Poinsettias" from Stampendous (AC999RV)
Class A' Peel "Dot Sparklers" from Stampendous (AC672HSR)
Satin Red Versafine ink from Tsukineko
Bazzill green cardstock
Red Linen cardstock from Kelly Paper
print unknown
ribbon (Creative Impressions)
Monday, December 6, 2010
Home to Home Forest Scene
I suddenly realized just how close Christmas is, and I have so many cards to post still! Here's one of my faves using Stampendous' new Forest Cottage Scene. I know I posted something a little similar way back in July when this stamp was first released, but the process on this one is a little different. For this one I colored the whole scene with Copic Markers before placing a sheet of Peel N' Stick double-sided clear adhesive over the entire panel. Then I covered the panel with Crystal Glitter. The panel was adhered to a Coredinations card which had been sanded first, and a torn piece of DP had been added. The tiny bunch of pine cones I found on a walk some time ago. I added Liquid Applique and more glitter to them, before tying a ribbon knot over the bunch and a tag with the sentiment. I'll probably have to mail this card in a box to prevent the pine cones from getting squashed, so I'll have to make sure it goes to someone special! Any takers?
Cling "Forest Cottage Scene" from Stampendous (CRR123)
Perfectly Clear "Holiday Home" set from Stampendous (SSC1067)
Multi Ultra-Fine Crystal Glitter from Stampendous (GM220U)
Therm O' Web "Peel n Stick" from Stampendous (FX70)
Tuxedo Black Memento from Tsukineko
Copic Sketch Markers
Coredinations cardstock
white cardstock
MME "Bohemia" print paper
American Crafts ribbon
pine cones
white Liquid Applique from Marvy-Uchida
Zots from Therm O' Web
Sunday, December 5, 2010
Sparkle Stocking
It's no wonder that my entire house, car, cats, and clothing seem to be sparkling lately. I seem to be adding glitter to everything! Let's face it, the holidays ARE the Sparkle Season! This card is no exception to that rule. The Long Stocking was stenciled with white embossing paste onto a striped print paper and sprinkling heavily with Crystal glitter before setting aside to dry. Meanwhile, I ran the dark green panel and the red panel through my Big Shot with the Diamonds and Large Dots stencils from Dreamweaver Stencils. A cute homespun plaid bow was tied to the the green panel with a jumbo sentiment brad added. Once the stocking was dry, it was cut out, shaded slightly with a light gray marker, and little pompoms were added for fun. In my opinion, all holiday projects should start with a pinch of tradition, a scoop of fun, and a lot of sparkle!
Pam
Long Stocking (LL499), Large Dot (LJ804), and Diamonds (LG618) from Dreamweaver Stencils
White Embossing Paste from Dreamweaver Stencils (DEP)
Multi Ultra-fine Crystal Glitter from Stampendous (GM220U)
Bazzill Cardstock, Me & My Big Ideas print
Jumbo Brad Sentiment (Queen & Co.)
ribbon (JoAnns)
Note: Be sure to check back on Thursday for the next Dreamweaver Stencil's Thursday Dream Scheme!
Subscribe to:
Posts (Atom)