Showing posts with label DW/WW '13. Show all posts

Saturday, August 17, 2013

Dreamweaver and Woodware UK: Christmas in August...the Tradition Continues, Day Six


Welcome to the grand finale of the annual Dreamweaver and Woodware Christmas in August extravaganza week! Monday through Saturday we've been knocking your Christmas stockings off with fun and inspirational ideas for the upcoming holidays. All that you need to do is hop back and forth across the "pond" on each day, oohing and aaahhhing as you go, and leaving us plenty of holiday love. In return, you'll be entered to randomly win one prize package for a UK commenter, and a second prize package for a US commenter, featuring products distributed in the UK by Woodware...including Dreamweaver and Stampendous!

Prize includes four stencils, one die, and two stamps, selection may vary.


Here's what I've created for today:


No cheating today! I made sure that I had the time to create this cutie! I've always loved House Mouse images, and I'm so excited that Stampendous is the manufacturer on these little guys, and that Woodware UK will be carrying them as well!

Once again I've had the opportunity to combine two of my favorite companies, Dreamweaver and Stampendous. This House Mouse image is "Berrying Gifts", which I've stamped in black, and colored and blended with markers. Then I placed the Dreamweaver Snow Splatter stencil over the top, and paste-embossed with Regular White Embossing Paste, and sprinkled Stampendous Fine Crystal glitter over the wet paste and set it aside to dry.

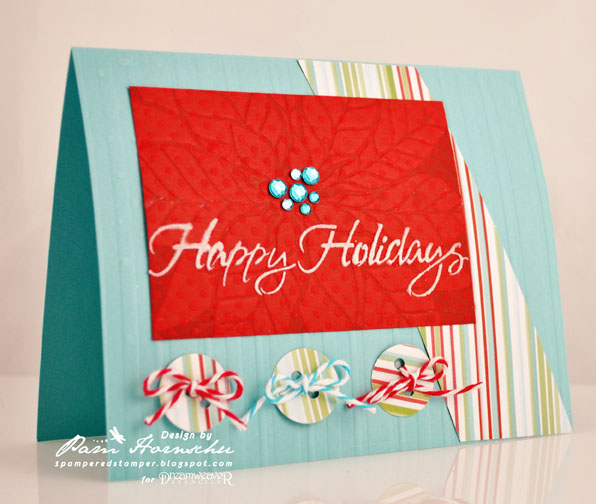
Meanwhile, I also paste-embossed in white the Dreamweaver Pine Cones stencil on clear acetate, and heaped more crystal glitter over the surface. While both pasted items were drying, I worked on the card base...a large square white card, with a layer of created plaid over the top. I actually had this panel sitting in my "kibbles and bits" basket...where I save the pieces that were too good to throw away. The panel was created by inking the Plaid/Stripes stencil with Blue Lagoon ColorBox Chalk Ink and running it through my Big Shot with the cardstock panel. (Warning! Do not EVER run the Plaid/Stripes stencil through any machine with the "stripes" going crossways, they should always enter the machine parallel with the sides of the platform!) After the blue bands were created, I cleaned the stencil, and inked once again with Yellow Cadmium ColorBox Chalk Ink. Remember...the stencil goes in parallel, so it is the paper that must turn 90° before being placed on the stencil, and running it through the machine to create the plaid. By the way...you do know how to do the proper sandwich for stencils in these machines, don't you? Just in case...

     1) base platform, 2) stencil, 3) paper, 4) rubber embossing mat, 5) TWO clear plates!

When the pasted sections were dry, everything was layered, and the acetate sheet folded over the top of the card, and held in place with bright red brad fasteners. For a little more dimension, I added a drop of Glossy Accents on each berry.


Now's the time for you to leave a comment and move on to the next designer for today:

Friday, August 16, 2013

Dreamweaver and Woodware UK: Christmas in August...the Tradition Continues, Day Five


Welcome to the annual Dreamweaver and Woodware Christmas in August extravaganza week! Monday through Saturday we will be knocking your Christmas stockings off with fun and inspirational ideas for the upcoming holidays. All that you need to do is hop back and forth across the "pond" on each day, oohing and aaahhhing as you go, and leaving us plenty of holiday love. In return, you'll be entered to randomly win one prize package for a UK commenter, and a second prize package for a US commenter, featuring products distributed in the UK by Woodware...including Dreamweaver and Stampendous!

Prize includes four stencils, one die, and two stamps, selection may vary.


Here's what I've created for today:


I have to admit...I cheated a bit on today's post. I created this card a couple of years ago for a sketch challenge, but it was always on of my favorites...so here it is again! This is a fun and easy card to create in multiples. Here's how I made it:
1) Machine emboss the Stripes stencil on the light blue card.
2) Angle cut a patterned cardstock and adhere.
3) Ink the Poinsettia stencil with a red ink slightly darker than the cardstock panel, and machine emboss.
4) Paste-emboss Happy Holidays on red panel with White Embossing Paste. Let dry. Adhere to card.
5) Punch circles of patterned paper. Punch "button holes".
6) Tie striped twine through each "button" and make bows. Adhere to card.
7) Embellish poinsettia with crystals.

So simple that it's no wonder I'm posting this card again!

Now's the time for you to leave a comment and move on to the next designer for today:


Thursday, August 15, 2013

Dreamweaver and Woodware UK: Christmas in August...the Tradition Continues, Day Four


Welcome to the annual Dreamweaver and Woodware Christmas in August extravaganza week! Monday through Saturday we will be knocking your Christmas stockings off with fun and inspirational ideas for the upcoming holidays. All that you need to do is hop back and forth across the "pond" on each day, oohing and aaahhhing as you go, and leaving us plenty of holiday love. In return, you'll be entered to randomly win one prize package for a UK commenter, and a second prize package for a US commenter, featuring products distributed in the UK by Woodware...including Dreamweaver and Stampendous!

Prize includes four stencils, one die, and two stamps, selection may vary.


Here's what I've created:

Now, here is a unique take on color for Christmas! Bright pink and black! Using the Ornate Christmas tree, I machine-embossed the design on pieces of pink and silver aluminum, and paste embossed in Glossy Black on the pink cardstock. The stencil was place over the top of the pink aluminum to sand away the color from the embossed surface, and then black StazOn ink was applied to the sanded areas. The various completed panels were cut out and layered on the black card, and depending on how many panels you create, you can have multiple variations. A ribbon bow, a sparkle pompom, and Decorative Pin, and a sentiment completes the card.


Now's the time for you to leave a comment and move on to the next designer for today:


Wednesday, August 14, 2013

Dreamweaver and Woodware UK: Christmas in August...the Tradition Continues, Day Three


Welcome to the annual Dreamweaver and Woodware Christmas in August extravaganza week! Monday through Saturday we will be knocking your Christmas stockings off with fun and inspirational ideas for the upcoming holidays. All that you need to do is hop back and forth across the "pond" on each day, oohing and aaahhhing as you go, and leaving us plenty of holiday love. In return, you'll be entered to randomly win one prize package for a UK commenter, and a second prize package for a US commenter, featuring products distributed in the UK by Woodware...including Dreamweaver and Stampendous!

Prize includes four stencils, one die, and two stamps, selection may vary.
Here's my creation for today's post:

Sometimes when you are in the middle of a creative brainstorm (and that's putting it nicely!), you feel the need to throw everything on the card! And sometimes it actually works! For this card, I used Dreamweaver Regular Embossing Paste with the Oval Ornament stencil, and while still wet, I pressed a generous handful of bright colored buttons into the surface. I sprinkled the in-between spaces and the top of the ornament with Stampendous Multi Fine Crystal Glitter for sparkle. (The fun part was swiping away the extra glitter from the buttons!) I added peppermint striped baker's twine to the top, and layered the kraft panel onto a kraft card and fun paper. A sweet little Stampendous sentiment stamped in red was the finishing touch!


Now's the time for you to leave a comment and move on to the next designer for today: