Showing posts with label hop. Show all posts

Friday, October 17, 2014

Dreamweaver/Stampendous/Core'dinations: SANDY Claus is Coming to Town - Finale!


SANDY Claus is Coming to Town!

Yes...SANDY Claus! All of this week, the Stampendous and Dreamweaver teams are playing with a mix of their products, along with some wonderful, SAND-ABLE papers from Core'dinations. Join us as we sand our way to the "core" of all things Christmas and the Holiday season. Of course, there will be prizes, and we give away the best...this time with a mix of fun Core'dinations products as well. To be one of three prize package winners, follow the posted link lists each day, leave a comment, and winners will be selected from these comments at the beginning of next week. Here is what you might win:


Here's what I'm showing off today:

What a jolly way to end this week's hop...with Santa! Specifically the Stampendous Cling Santa Reins, stamped in Tuxedo Black Memento ink from Tsukineko, and colored with Copic markers. I added some Dreamweaver Regular Embossing Paste over his beard, hat, and cuffs, and "fluffed" it a bit with the tip of a palette knife. A generous pour of Stampendous Multi Crystal Glitter over the surface, and pressed in slightly to adhere, gives him the sparkle that he deserves. The card base is a great textured piece of Core'dinations cardstock. On top of this is a white cardstock panel paste-embossed in Glossy Red using the Dreamweaver Chevron stencil design.  A die cut Holly Swirl from Dreamweaver, and a die cut Snowflake from Stampendous, layered with a May Arts ribbon knot finish off this card.


Leave a comment for me, and head to the next on the list:

Dreamweaver:
Pam Hornschu*
*On Stampendous team as well

Core'dinations:
(will not be posting on their company blog, but individual posts only)
Tami Mayberry

Head on over to the Stampendous blog for links to their posts:

Thursday, October 16, 2014

Dreamweaver/Stampendous/Core'dinations: SANDY Claus is Coming to Town - Day Four


SANDY Claus is Coming to Town!

Yes...SANDY Claus! All of this week, the Stampendous and Dreamweaver teams are playing with a mix of their products, along with some wonderful, SAND-ABLE papers from Core'dinations. Join us as we sand our way to the "core" of all things Christmas and the Holiday season. Of course, there will be prizes, and we give away the best...this time with a mix of fun Core'dinations products as well. To be one of three prize package winners, follow the posted link lists each day, leave a comment, and winners will be selected from these comments at the beginning of next week. Here is what you might win:


Here's what I'm showing off today:

Okay. I am officially in love with Stampendous' new "Spoonful of Snow"! A pre-mix of chunky white embossing powder, crystal glitters, and Shaved Ice, all in its own container to scoop over any pigment or watermark ink. Just heat and watch the magic happen! In the case of my card today, I had paste-embossed the Dreamweaver Mittens in regular white paste, and poured the "Snow" over the surface. I pressed it into the paste a bit, and let it sit a few minutes before heating it. The paste puffs a bit, the glitters and embossing powder meld, and the shave ice adds the most iridescent bits of color you've ever seen!

The base of my card is Core'dinations Essentials cardstock in teal and aqua, which has been machine-embossed with the new Dreamweaver Holiday Borders Embossing Folder, sanded, cut in panels, and adhered to the card front. The large snowflake is from a new set of dies from Stampendous which matches a set of Snowflakes stamps. I used the largest die as my base for this fun Winter Wonderland sentiment, stamped with Versamark and embossed in Aqua Embossing Powder.


Leave a comment for me, and head to the next on the list:

Dreamweaver:
Pam Hornschu*
Alison Heikkila
*On Stampendous team as well

Core'dinations:
(will not be posting on their company blog, but individual posts only)


Head on over to the Stampendous blog for links to their posts:


Wednesday, October 15, 2014

Dreamweaver/Stampendous/Core'dinations: SANDY Claus is Coming to Town - Day Three


SANDY Claus is Coming to Town!

Yes...SANDY Claus! All of this week, the Stampendous and Dreamweaver teams are playing with a mix of their products, along with some wonderful, SAND-ABLE papers from Core'dinations. Join us as we sand our way to the "core" of all things Christmas and the Holiday season. Of course, there will be prizes, and we give away the best...this time with a mix of fun Core'dinations products as well. To be one of three prize package winners, follow the posted link lists each day, leave a comment, and winners will be selected from these comments at the beginning of next week. Here is what you might win:


Here's what I'm showing off today:

"Twas the night before Christmas, and all through the house, not a creature was stirring, not even a MOUSE"! But, who wouldn't love this little House Mouse® Design stirring, or tucked in their Christmas stocking? Especially since little Maxwell brings a message of JOY (from the new Dreamweaver Dual Alphabet Die set) when you pull him up and out. Maxwell has been colored with Copics, is wearing a hat cut from the same Core'dinations Glitter Silk cardstock as the Dreamweaver Die Cut Stocking. A slit at the top of the stocking allows the pull-tab to slide all the way down inside the layers of the card. A trim of pompoms from May Arts is added to the stocking, and a sparkle pompom to his little Santa hat. The sentiment at the base of the card is from the Stampendous Cling Jumbo Dear Santa set, embossed in white. For this card, no sanding was done to the Core'dinations papers, as they are beautiful all on their own.


Leave a comment for me, and head to the next on the list:

Dreamweaver:
Pam Hornschu*
*On Stampendous team as well

Core'dinations:
(will not be posting on their company blog, but individual posts only)
Joann Jamieson

Head on over to the Stampendous blog for links to their posts:


Tuesday, October 14, 2014

Dreamweaver/Stampendous/Core'dinations: SANDY Claus is Coming to Town - Day Two


SANDY Claus is Coming to Town!

Yes...SANDY Claus! All of this week, the Stampendous and Dreamweaver teams are playing with a mix of their products, along with some wonderful, SAND-ABLE papers from Core'dinations. Join us as we sand our way to the "core" of all things Christmas and the Holiday season. Of course, there will be prizes, and we give away the best...this time with a mix of fun Core'dinations products as well. To be one of three prize package winners, follow the posted link lists each day, leave a comment, and winners will be selected from these comments at the beginning of next week. Here is what you might win:


Here's what I'm showing off today:

My card today is all about family. All the love and joy of having a large family together for the holidays...I miss that. Child-like wonder listening to Mom play Christmas carols on the piano, with Dad singing slightly off-key. Grandparents and cousins visiting from afar. My brother running around with a Santa hat on. A fire in the fireplace reflecting firelight off of the ornaments on the tree. And the yearly Christmas tradition of my brother and I decorating (and eating) gingerbread boys with my Gran, while wearing brand new Christmassy pajamas.


It was quite simple to conjure up those feelings again while playing with the Dreamweaver Ornate Tree...machine-embossed on Core-dinations signature cardstock, sanded, and ink-stenciled over the top  before adding the shine of Stampendous Clear Embossing Powder. The sentiment panel was a Dreamweaver Embossing Folder used with more Core paper, and sanded to reveal the old carol, and add a bit of aged love.

The final touch, the Stampendous Christmas Train stamped, colored a bit, and sanded before being cut out to wrap around the base of the tree with a sprinkle of Color Fragments for more texture, all layered and adhered on a aqua Core'dinations cardstock base.


Leave a comment for me, and head to the next on the list:

Dreamweaver:
Pam Hornschu* 
*On Stampendous team as well

Core'dinations:
(will not be posting on their company blog, but individual posts only)
Gini Cagle

Head on over to the Stampendous blog for links to their posts:


Thursday, June 12, 2014

Dreamweaver Stencils and Imagine Crafts/Tsukineko: Endless Possibilites - Day Four

 Welcome to our first ever collaboration week with Imagine Crafts/Tsukineko! We've shared all of our toys on both sides, so be prepared for Endless Possibilities! Three prize packages are available, each containing one set of each of these inks and stencils/dies. Just leave comments on each post of each day this week (June 9th - June 13th) for a chance to win! Winners will be announced on Tuesday, June 17th!
Imagine Crafts New StazOn Pads from Tsukineko
Stencils and Dies Prize Package
Here's my creation for today:

Back to the Neons again! This time with something NEW (fits this month's challenge at Dreamweaver!) to play with...Imagine Crafts Vertigo sheets...polycarbonate holographic and translucent plastic that take the Tsukineko inks brilliantly, literally and figuratively. I used the new Dreamweaver Stylized Dahlia DIE with this, and I have to admit, it really is a bit too thick for die-cutting. I had to go back at some areas with my craft knife. Next time, I think that I'll try adding a thin shim and running it through twice. However, the end result was cool.

I had Googled this product to see what others have done with it, and noticed that some had molded it a bit using a heat tool. So, I smooshed the back side of the die-cut Dahlia with the Pink and Green Neon inks, and then began to heat it. Yikes! The stem pretty much turned into a limp noodle as it was so fragile, and I was using my Milwaukee heat tool, which is much hotter than most...but...the warmed flower and leaves were simple to maneuver and curve, and stayed that way when cool.

Of course, I had to use the Vertigo panel that I had left over from the die-cut, so I smooshed Pink, Blue, and Green Neon inks over the back of it. I heat set the ink a bit before ink-stenciling in Neon Purple the Dreamweaver Crusade Background. After heat setting this, all that was left was to adhere the panel to my card card using spray adhesive (doesn't show under translucent products), ink stencil the sentiment from the Dreamweaver Birthday Words, and adhere the now 3D flower and leaves. For these, I placed glue dots under the smooshed ink areas to hide them a bit. The end result would be difficult to mail, but worth it!


As a reminder...the Dreamweaver team are playing with their monthly challenge as well, which features "Old, New, Borrowed, Blue", so please link your appropriate creations to the inlinkz at the end of this post or on the Dream It Up! blog for a chance to win the stencil of your choice at the end of the month! Just Imagine the possibilities of what everyone else has created!


Thursday, November 7, 2013

Dreamweaver Stencils: Festively Distressed with Ranger Hop!


Ready to be festively distressed once again? The Dream Team have been playing with Ranger's Distress Paints, and are ready to inspire you to be distressed as well...paint distressed that is! Dreamweaver Stencils are the perfect choice to mix with all things festively distressed, as nothing shows off color and texture better than great designs. By following our hop and leaving love along the way, you have the opportunity to win a great prize package including five Ranger Distress Paints and five Dreamweaver Stencils! Here's the lineup for today, including our November Guest Designer:


This is also our first posting day featuring our new monthly challenge, "Holiday Celebrations", and for the entire month we will be demonstrating ways to use Beacon Adhesives' entire line of products with Dreamweaver to create special projects in home decor and gifts of love. Here's mine:


I purchased a plaque made from a slice of black slate at a local craft store, and adhered a torn sheet of music with Beacon Fast Finish over the surface. When dry, I used the dabber bottle of Ranger's Tim Holtz Distress Paint in Broken China over the surface as a wash, with some softer swipes of Frayed Burlap around the edges to soften them. When dry, I paste-embossed the Dreamweaver Season of Joy in white and covered it with ultra fine crystal glitter. Once dry, I added a sculpted paste "snowbank" at the bottom and covered it with chunkier glitter. I had purchased a small tree, and applied Picket Fence Distress Paint over the branches, and sprinkled more glitter. (Notice a sparkly theme going here?) I trimmed the back of the tree to make it fit against the plaque better. A skinny strip of music was distressed with more paint and wrapped around the tree before adhering to the plaque with Beacon FabriTac. A few crystals on the star, a luscious bow from May Arts was almost the finale...but no, I had to add paste to a pine cone with, yes, more glitter!


Saturday, October 6, 2012

Stampendous and May Arts are Hopping Again!


All of this week, the Stampendous and May Arts' teams have been wowing you with a fabulous mix of Stampendous images and Essentials, along with the absolute perfection of May Arts' line of ribbons, trims, and cording.

For today's hop, I'll keep the info fairly simple. I created a small wall-hanging on a chipboard base, with background layers of Bazzill papers with a "brush finish" of Versamark ink and Stampendous White Embossing Powder. This same ink and EP acts as a resist in stamping the Cling Follow Art sentiment, when layering a variety of Memories Mists inks through the Dreamweaver Open Heart stencil. Spritzed with water, these inks run and mingle. The Stampendous Cling Music Score was stamped over the panel with Rich Cocoa Memento. All the layers were distressed with ink and torn edges. A stamped and embossed layer of Cling Dragonfly Vine dragonflies were spritzed as well, before fussy cutting and attaching to the branch. The inks wipe clean from the embossed areas and provide beautiful contrast.

I used the May Arts Cotton/Stripes to attach the piece to the branch. A swath of their wonderful Net in natural adds to the airy look. The panels have been wrapped with the Twisted Burlap Cord in Olive, with a Suede tie around the feather. All of these May Arts products went with the "nature" theme that I was working with. Just a hint...if you can't make up your mind what colors to choose from all that fabulousness on the May Arts' site, go with the natural colors, and use your own ink pads, stains, and mists to color to match your projects!


Here is where you leave me a nice comment, and move onto the rest of the players today from both teams for an opportunity to win some fabulous prizes from Stampendous and May Arts.  You will have so many inspiring things to look at today! Hope you have a huge beverage, a warm kitten, and a really comfy chair! All the designers have pulled out all the stops and the spools have been flying. Wait until you see the gorgeousness by these talented ladies:

Saturday, June 30, 2012

"Clearly" Amazing Blog Hop!


We are super excited about the fun we’re having with the folks from ClearScraps and the generous people at Tsukineko who supported our blog collaboration this week. Loving how the acrylic surfaces really lend themselves to being used with so many different ribbons, patterned papers, and, of course, stamps, stickers, and other products from Stampendous! Too much fun!


And, naturally, a huge Prize Package doesn’t hurt! You could win a fantastic load of swag just for commenting on these terrific creations! Remember that the folks over at the ClearScraps Blog have more prizes as well!! There are three ways to win our goodies! Comment on the blogs all week and we’ll enter you once for every comment! Then:
  • Go to our Stampendous Facebook Page.
  • Find the post for this Blog Hop Collaboration – It should be “pinned” as the first post on our page.
  • Click on SHARE below the post (it’s probably in blue)
  • A little box will pop up – choose On Your Wall
  • Bam – you’re entered! (PS… chances are in your favor… no one shared Monday’s post!)
Here is my creation for today's huge hop:


Using the base of the Clear Scraps "Sassy" 8 X 8 album, which is a mix of clear acrylic and chipboard pages, with a unique layer of pages and edges, a batch of Tsukineko inks, and of course, a slew of Stampendous images and goodies, I went to town on this project. I have to admit, I worked on this for several days, but I enjoyed every minute of it.

I knew that I wanted to use several pictures of darling Emily, the daughter of friends, who has pictures taken of her pretty much 24/7! And Mum (yes, she's British) does a fabulous job of photographing her daughter. I've teasingly asked her if Emily recognizes her without a camera in front of her face. But, who wouldn't want to photograph this child?

Anyway, I changed all of the pics to grayscale, and added only pink Copic coloring to tint them. I adhered her photos on mostly the chipboard pages, but made sure that she could be seen through the decorated acrylic pages. These pages start out with a protective film over them that needs to be removed before decorating them.


For the front clear page, I daubed Tsukineko's Cotton White StazOn over the back, leaving a portion blank for the photo on page two to show through. Then I stamped the Cling Blossom Spray image randomly over the front and back using the Black StazOn ink. StazOn is the perfect ink for stamping on non-porous surfaces like acrylic and acetate. Using various shades of aqua/teal and pinks, I carefully colored the back of the designs with my Copic markers. I stamped the Perfectly Clear Amore Frame as well as a title using the Altered Type Alphabet, and colored this as well. To make this framed area pop out, I painted behind it with aqua acrylic paint.


The second page is chipboard and was covered with a soft aqua paper stamped with the Cling Garden Background using Tsukineko's Turquoise Gem VersaMagic chalk ink. I stamped with VersaMark a few Butterfly Beauties over the page, and embossed them with Aged Rose Embossing Enamel. The edges and back of this page were painted with pink acrylic paint, and "white washed" with the Cotton White StazOn pad. A little ink distressing was added to the sanded edges with Angel Pink Memento. Small pockets were adhered for "Tiny Treasures".


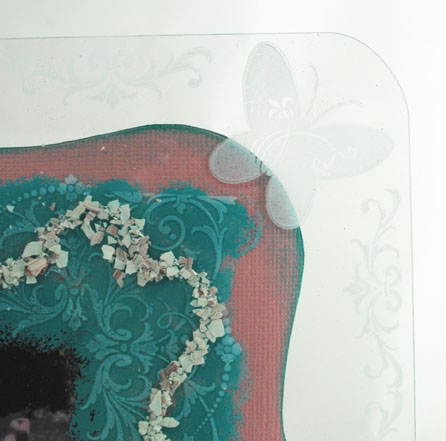
Page three is clear once again, with a rounded edge. This time I chose to show off how pretty it is to stamp with the Cotton White on the clear for an etched appearance. Using the flexibility of the Perfectly Clear Elegant Borders, I was able to curve the border to match the curve of the page. Cool, huh? A few adhesive pink pearls highlights this as well. I stamped the Cling Daffodil Girl on tissue paper with Tuxedo Black Memento ink, and colored her from behind with Copic markers. I adhered her to the back of the clear page by brush-applying Beacon Fast Finish Decoupage on the page, placing the tissue piece on top, and brushing more over this. Then I applied an even coating of Multi Crystal glitter...amazingly this sparkle shows through the translucent tissue from the opposite side as well!


Page four shows through page three, with darling Emily in her pink tutu, sitting near her garden fairy. I embossed the Perfectly Clear Vintage Frames over this pic using Aged Rose EE once again. All of this on a soft pink polka-dotted paper adhered to the chipboard page. The edges and the back of this page have been painted in aqua and "white washed" using the Cotton White StazOn pad once again. The back of page four also has a fun pocket for "Mum's Memories".


Page 5 is another clear page. I stamped the Perfectly Clear Elegant Borders and Butterfly Beauties around the edge, and a frame in the center with the Cotton White StazOn. I daubed aqua acrylic paint behind the center frame to highlight it. Since I wanted to adhere another pic from behind, I also added a distressed pink panel die cut to be several inches smaller than the page. This allows my stamped Elegant Borders and Butterfly Beauties to show off that etched look once again. For extra textural interest, I adhered a swirly design of Rose Color Fragments over the surface using Glossy Accents.

I finished up the album by inserting three "C" rings from the hardware store. These have small holes at each end which after inserting through the pages, I was able to tie off with ribbons. One jumbo scrumptious aqua ribbon bow from May Arts, along with some pink paper roses, completes the vintage garden feel that I was going for.


I realize that my post today was quite long-winded, and I totally understand if you want to leave your comment, and move on to the next in line of this fun hop, but I do hope you'll come back with your cup of tea in hand, and a couple cookies, and read through the details. Just don't leave any crumbs behind! Here are the players for the hop today:



Tuesday, April 24, 2012

Woodware Uk/Clearsnap Blog Hop

We're having a blog hop!!!

Welcome to the
Woodware and Clearsnap
Spring Gifts Blog Hop!!!

Whether you're getting ready for Mother's Day (US), graduation season, or just because, these gifts ideas can be made with a few Clearsnap inks, Rollagraph Stamp Wheels, and Woodware Craft Collection Clear Stamps. All week long we'll be sharing inspiring gift ideas on our blogs here:


I had so much fun playing with the Clearsnap products for my Woodware UK project! I took an ordinary unfinished wood frame, and made it extra-ordinary! I used Mandarin Ancient Page Re-inker and a sponge to color the base...works perfectly as a wood stain. I stamped the Clearsnap Rollagraph "Faux Postal" with the deepest color from the ColorBox Fluid Chalk Ink Queue "Sand Dunes". Unfortunately, my rolling wasn't as perfectly straight as I would have like, so I disguised it a bit...I used my Frost White ColorBox Pigment pad directly to swipe a "white-washed" look over the surface. To emphasize this further, I sprinkled on Stampendous White Embossing Powder, brushed away the excess (leaving convenient brush strokes), and heated this. Now my fun Rollagraph images aren't as prominent as I would like, sooooo...I stamp-rolled onto tissue paper with Chestnut Roan ColorBox Fluid Chalk in Cat's Eye. I love how the colors work together! I cut each section or "stamp" out and decoupaged them onto the frame with Beacon Adhesive's Fast Finish Decoupage. Love this product! Goes on thin, dries clear, and fast! I also decoupaged one of the tissue "stamps" onto a square Canvas Corp mini canvas. When dry, this became my framed focal point. I still felt like the project needed just one more thing, know what I mean? I broke out my Metallique Copper Card Candi and adhered them around the edge to mimic upholstery tacks. I love how they look on this!


Head on over to the Clear Snap Blog  and the Woodware UK blog to see what they've created today!! And don't forget to follow Clearsnap  on twitter and Facebook and you will find Woodware on Twitter and Facebook too.

Happy Hopping!