Monday, August 11, 2014

Dreamweaver and Woodware: Christmas in August-Day Two


Yes! It's that time of year again! The time when we inspire crafters on both sides of the "pond" with a mix of both Dreamweaver and Woodware UK* products for the holidays! Six days, SIX, of beautiful, elegant, merry, cute, artsy, and craftsy projects to have you heading out to your local stores or internet sites to buy these goodies immediately!


Of course, there will be prizes as well. Three prize packages will be given to three commenters during this week's posts on the team's blogs, including five stencils and one nested die set. You can have an opportunity to win these goodies by leaving some holiday sweetness for each team member posting each day, to be one of the three winners for the week. Here are the team members that are inspiring you today:

Pam Hornschu
Gill Wilson 
Jamie Martin
Debs Frost
 Jane the Flower Girl

Here's my creation: 


When I was over in the UK in July, Dorothy gave me a few packs of Woodware "Chippies"...chipboard shapes that come in a wide variety. As you can tell, she really had to twist my arm to use the Snowflakes and the Christmas set! My studio space will never be the same again. Chippies, Stampendous Encrusted Jewel Kits, and of course, Dreamweaver stencils and paste...it's everywhere. Even the cats are sparkling! It was quite addictive!

I punched out the shapes that I wanted to use. Many of them I paste-embossed the four snowflake designs from Dreamweaver in either white or silver, or inked with pigment white or silver ink, and embossed with Stampendous Royal Blue Tinsel, Spoonful of Snow, Spoonful of Silver, and Shabby Blue Embossing Enamel. The wet pastes were sprinkled with these items as well, and heated immediately in the technique that Dreamweaver calls "Molten Magic". It truly is magic, as it bubbles up with great texture, and all that sparkle on top becomes instant jewels! I didn't even stop at the punched out "Chippies". There were two extra large negative portions from the two giant snowflakes that were screaming to be decorated as well...so I did! One of them I inked all over in silver ink and heat set it. Then I placed the Dreamweaver Crusade stencil over the top, inked again with a sponge dauber, and poured Stampendous Royal Blue Tinsel Embossing Powder over the design. The end result adds to the "crystal" effect of snowflakes! Awesome! I took all of my parts and pieces and adhered them over a styrofoam wreath that I'd wrapped in Deco Mesh and glittery tulle. A jumbo blue May Arts ribbon bow was added, big sparkly pompoms, and the final touch? A large tag with just the "merry" portion from the Dreamweaver Jumbo Merry Christmas stencil paste-embossed and decorated in the same way as the snowflakes! This wreath gives new meaning to the "winter blues"!


*For a stockist near you contact Woodware Craft Collection in the UK and Notions Marketing in the USA.


Sunday, August 10, 2014

Dreamweaver and Woodware: Christmas in August-Day One


Yes! It's that time of year again! The time when we inspire crafters on both sides of the "pond" with a mix of both Dreamweaver and Woodware UK* products for the holidays! Six days, SIX, of beautiful, elegant, merry, cute, artsy, and craftsy projects to have you heading out to your local stores or internet sites to buy these goodies immediately!


Of course, there will be prizes as well. Three prize packages will be given to three commenters during this week's posts on the team's blogs, including five stencils and one nested die set. You can have an opportunity to win these goodies by leaving some holiday sweetness for each team member posting each day, to be one of the three winners for the week. Here are the team members that are inspiring you today:

Louise Healy
Alison Heikkila
Pam Hornschu
Lyn Bernatovich
Debs Frost
Gill Wilson
Francoise Collection
 

Here's my creation: 

I just love the expression on this little owl's face. He just looks so thrilled to be celebrating Christmas in August! I couldn't resist adding the Dreamweaver Joy sentiment with him.

I used Francoise Read's Owl Christmas Clear Magic set to stamp him in Onyx Versafine ink on a few patterned papers from Craftworks called Christmas Elements. I cut out the hat, scarf, and leaf to paper piece over the top of my gray owl. He was created by ink-stenciling the Dreamweaver Herringbone in Smokey Gray Versafine ink on gray cardstock, and then stamping him over the top in black.

More of the patterned papers were used on the background where, like I said, I ink-stenciled the sentiment in an olive green ink. Everything was layered onto a red card base, with the owl popped up with foam squares, and a fun sparkly pompom added to his hat. He was really excited by that addition, can't you tell?


*For a stockist near you contact Woodware Craft Collection in the UK and Notions Marketing in the USA.


Thursday, August 7, 2014

Dreamweaver Stencils: August as an Adjective!


As we are heading towards back-to-school again, it is only appropriate that we break out our dictionary for this month's Dreamweaver challenge..."AUGUST as an ADJECTIVE"!

Merriam-Webster defines august as, "marked by majestic dignity or grandeur", with synonyms such as, "dignified, distinguished, imposing, portly, solemn, staid, and stately". Now, I don't know just how dignified and stately the Dream Team can become for an entire month, but we are all going to give it a try! How about trying along with us, and linking YOUR creations to the inlinkz tool below for a chance to win the wildest stencil design your little heart is screaming for.

Here's my creation for this week:

I love simple and elegant, and this set of cards would be perfect for an elegant birthday, wedding, anniversary, etc. I love the cool light green shade of the WorldWin cardstock. Once again, I used the positive and negative images of the Dreamweaver Stylized Dahlia die. One panel was popped up with foam tape over an under-inking of Tsukineko Delicata ink in Silver Shimmer, with a sprinkling of Stampendous Transparent Stardust Embossing Powder melted over the surface. The sparkle just peeks through the negative portion left from the die cut.
The positive portion of the die was partially adhered over the top of two inkpad-direct-to-paper rectangles of the same ink and embossing powder sparkle combo, with the leaves and petals popped up with foam tape. Note: If you wanted to create these cards in multiples, I would highly recommend lining the back of the cardstock panels with Dreamweaver Double-sided Mounting Paper before die-cutting. Adhering will be much simpler, and will take less time than placing tiny pieces of foam tape everywhere. Of course, if you have infinite time and patience...go for it! used the new Dreamweaver Nested Ovals dies to cut my sentiment panels, and pasted these in silver for more shimmer and elegance. A bit of sheer and satin ribbon was the finishing touch! I think this is a fairly "august" pair of cards today...what do you think?


Wednesday, August 6, 2014

Woodware: Midsummer Magic

v
This week our retailer theme of  "Midsummer's Day" has been chosen for us by Teresa of Philpotts.They are an online store with a lovely website and blog which is peppered with inspiration. You can find them at Philpotts.com and don’t forget to visit their blog, and find them on Facebook.

I love this challenge! So much fun to go off to that old world of faeries, sprites, and magic! Though Midsummer's Day was traditionally celebrated on the 23rd or 24th of June, we know the longest day, or Summer Solstice, falls somewhere on the 21st of June. However, I've always loved the more traditional date, as my birthday is on the 24th.

In any case, my card for the challenge features the beautiful Stampendous Fairy Queen clear set. I stamped her in gray ink, and colored her with watercolor pencils, going over the coloring with a wet paintbrush for the softer look. I created a mask for her so that I could create the background sky. Using a Dreamweaver larger stencil brush, I swirled Tsukineko pigment inks in yellow and orange. The outside edges were stenciled in swirls of gray and black ink for a more magical effect of calling the brightness of the moon or sun to push back the dark. To add to the mood, I brushed gray ink over the Dreamweaver Bare Trees stencil, and pressed the colored panel to the surface, transferring the inked design of the trees. I heat set the ink a bit before swiping white and yellow ink down across the front of the fairy. I added a few dots of Sakura Gelly Roll Moonlight in yellow randomly, along with dots of glue marker for sprinkling on Stampendous Crystal Glitter Mix. I die cut the Dreamweaver Petite Fern from gauze paper, added a bit of glitter to it as well, and finished the card with a sentiment from the Stampendous Amore Frame Set.
 

Thursday, July 31, 2014

Woodware: The Age-Old Technique of Masking


IF YOU ARE HERE FOR THE DREAMWEAVER "JULY TO DIE FOR" POST, PLEASE SCROLL DOWN TO THE NEXT POST.
 
The technique of masking in art can have a couple of purposes. It can aid you in creating a background by masking away the fore-ground. This can be accomplished by creating a second version on scrap paper, or even better, sticky notes. Cut this secondary piece out, place it over the original to mask that off from whatever you decide to add to the background. I'm sure that at least a few of our ladies on the Woodware team will be demonstrating this during our challenge week of "Masking". My version is a bit different.


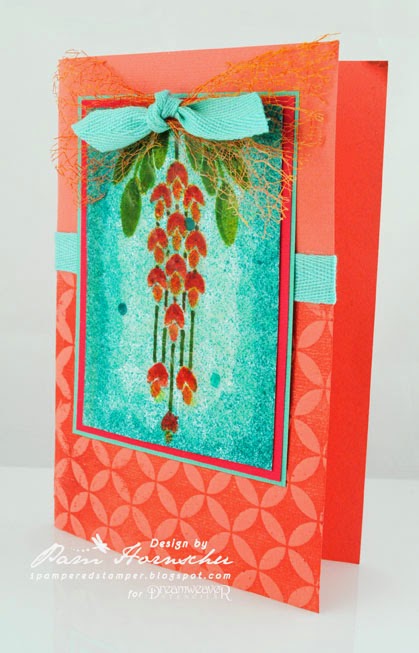
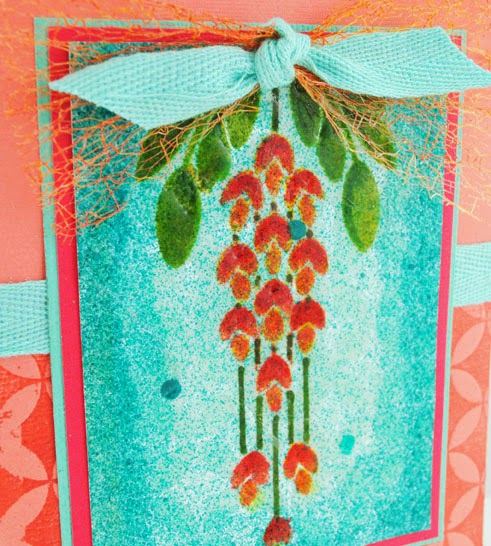
Sometimes you create a focal panel that you love, but it's just missing something. That was my problem with the Dreamweaver Hanging Wisteria design above. I had used stencil brushes and a palette of ink to color and shade. I was happy enough with the design, but just wanted to showcase it a bit more. I wanted a bit of visual texture as well. I wanted a bit of spray and spatter. But that can be  tricky over the top of something else. Too easy to overspray and completely cover your original design. Here is where masking comes into play.

I tore a portion of a sticky note on all sides, slightly smaller than the original panel, and centered it over the design. Then I used my ink mist in aqua, just once over the surface. I removed the "mask", and tore more paper around the edge to make the mask smaller, and placed it over the design once again. And sprayed, just once. This time, I removed the mask entirely, and misted over the entire panel, design and all, just once. This final one added a fine texture and pale color without overwhelming the design. The previous two sprays and maskings, provided a bit of an ombré look, and at the same time, framed the wisteria design...truly making it the focal point.

The card was finished with a card base with the Dreamweaver Cathedral Window stencil letter-pressed into the surface...also a form of masking as the ink is only on the stencil, and then pressed into the surface of the cardstock, leaving the rest of the design "masked".
I hope that you have fun playing with all the ways that you can add masking to your art. Remember to check back on the Woodware blog each day for more inspiration!


Dreamweaver Stencils: July to DIE For Finale...Spelling It Out!

A-PEAR-ently, it is once again another Dreamweaver July to DIE For post! Obviously, dies are great for quick and CAS design, but they can also be fun to incorporate into a mixed media card or project.

This card features the Pear Dies and the soon-to-be released new Alphabet Die set, which comes with its own caddy to store the dies and extra die-cut letters in. The new alphabet provides two uses of each die cut...one the positive letter from the centers of the squares, and the other the negative portion left from the die cut. It can be really fun to mix both!

I had a panel of cardstock that I had left from a project using the Stampendous Creative Palette, where I had drizzled Aquamarine, Lemoncello, Citron, and a bit of Paprika Color Solutions alcohol inks, spritzed with the blending solution, and ran several panels through the colors. Then I paste-embossed a portion of the Petals Background stencil in Glossy Blue in the center.

I die-cut one pear and leaf from this panel, and then die cut the small leaf from that larger leaf to use on the pear at the bottom of the card. Are you wondering why I didn't just die-cut the small one and skip the large one? Because the larger one looks best on that negative panel! I die-cut the smaller pear from the beautiful blue Bazzill cardstock, and built the layers over the top of the green card base, leaving a space between the blue panel and the pasted portion at the bottom for dimension.

Finally, I die-cut the alphabet to "create" my sentiment, grunging it a bit with Versafine inks and a sponge dauber. To balance things a bit, and bring out the paprika color, I added a polka dot ribbon bow with a button and twine, as well as the smaller pear and leaf, and a button that mimicked the core and seed portion of the pear...sort of.

I think I was channeling my inner Kristi Parker Van Doren for this card. What do you think?

I wonder what the Dream Team has created for their final July to DIE for post? What have your created? Be sure to upload it to the Dream It Up blog inlinkz tool for a chance to win this month!


An InLinkz Link-up

Friday, July 25, 2014

Woodware UK: Mixing it Up for Summer

The Woodware team has been challenged to a Mixed Media challenge this week, with either a Summer or a Body Beautiful theme. Guess which one I decided to go with? 

I used a basic 6 X 6 square canvas for this, but you could easily use the Woodware Canvas Paper and either wrap a frame with it, or frame it when finished, or not...up to you.

The background was swiped with various bright color inks, sprinkled with rock salt, and spritzed with water. The colors move a bit, and the rock salt causes a bit of splotchiness and texture. When dry, I used thinned down Dreamweaver Glossy White Paste to give a washed look to the Dreamweaver Large Scales design on the side. I used the same Glossy White Paste to paste-emboss the new Dreamweaver Sailboat, adding a few extra choppy waves with paste on the edge of my palette knife. Once again, this was set aside to dry.

Next I ink-stenciled the Twin Palms on the side using my Tsukineko Splendor ink pad as my palette, and added the small Flourish as well. The finishing touch was ink-stenciling the Summer word at the top, and adhering a sprinkling of Stampendous Color Fragments in Lime and Teal. I fully intend to do the other three seasons, as this was really a fun project!

All of this week, the team will be posting their mixed media creations, so be sure to check the Woodware blog daily! Oh, and we'd love for you to share your own creations!